Film Look for Sunset Photography
Film Look for Sunset Photography
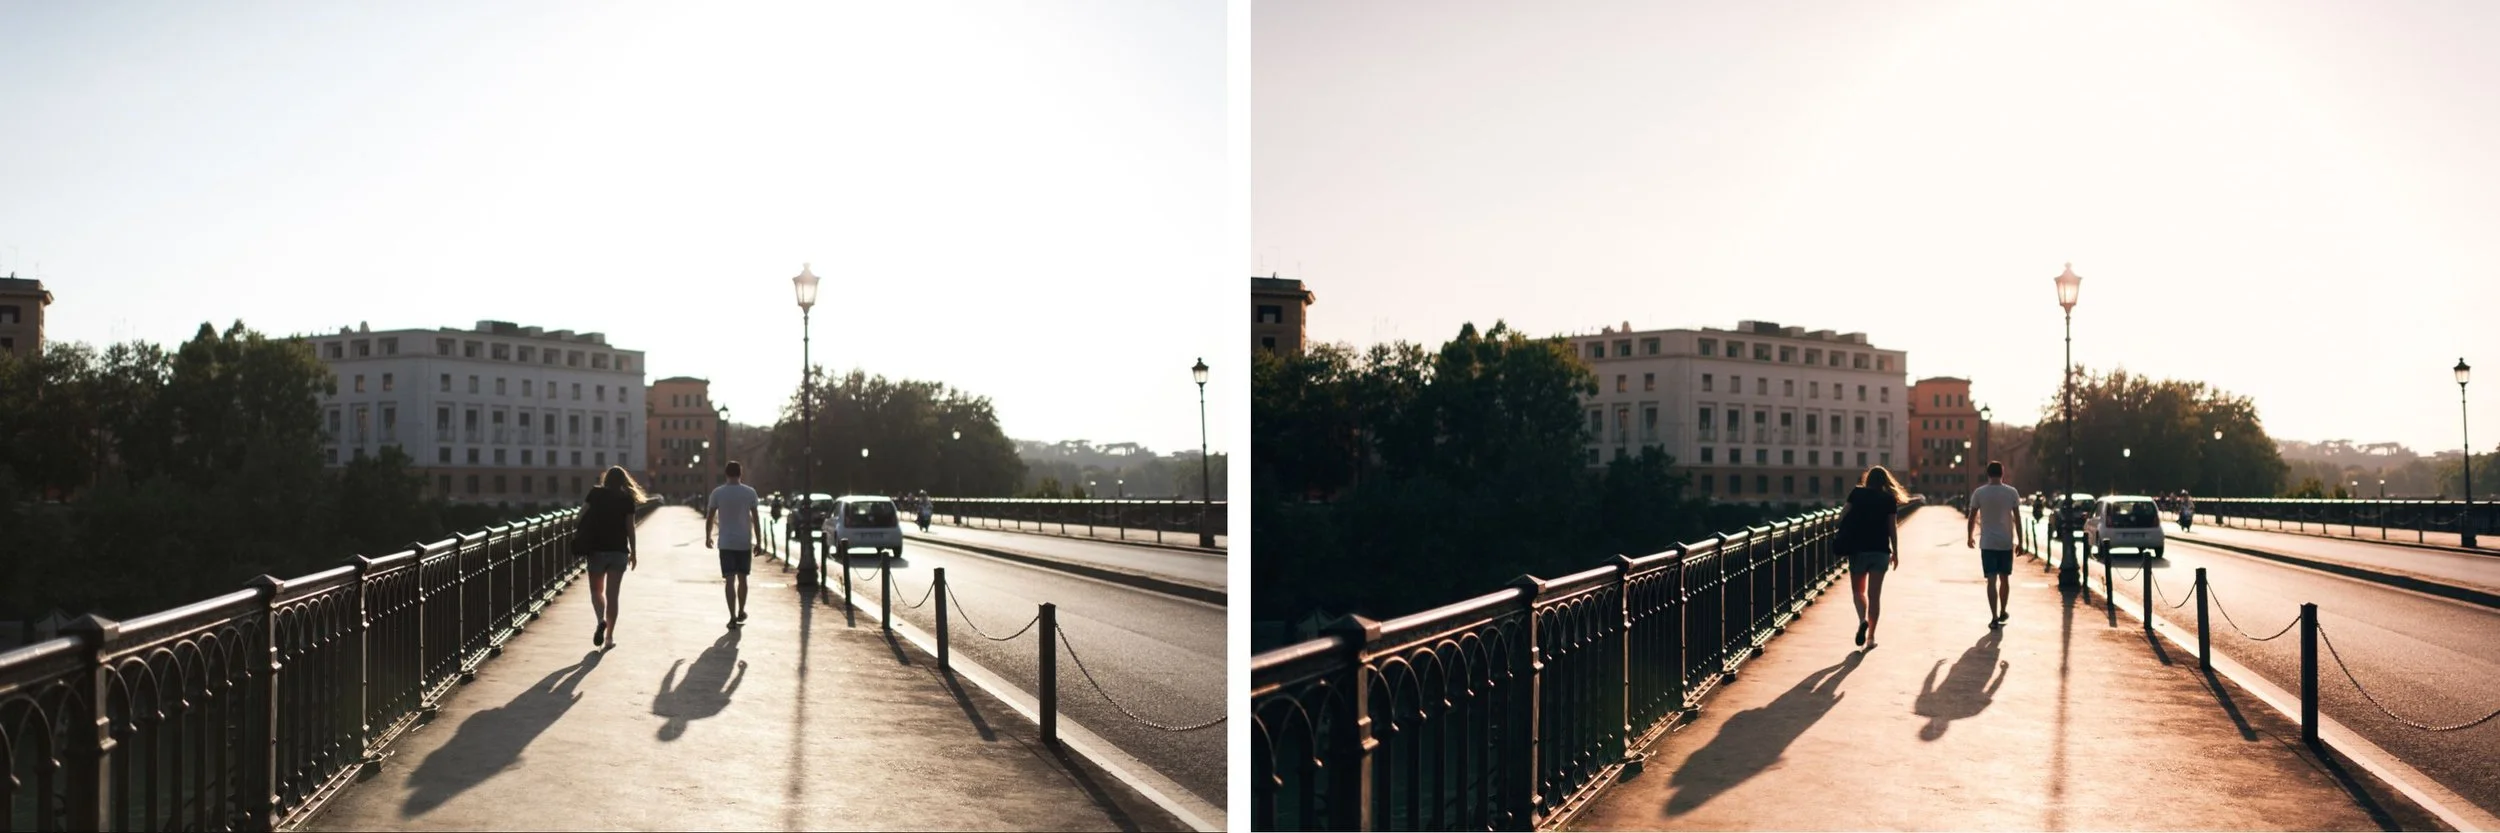
Sunset photography contains more colour information than any other lighting condition. Deep oranges, warm reds, cooling blues in the upper sky, and the full transitional range between them appear in a single frame. This abundance is what makes sunset photography compelling and also what makes it the easiest lighting condition to overcook in post processing.
The film approach to sunset photography is about restraint rather than amplification. The colour is already present in the scene. The editing work is structuring it, protecting it, and preventing the digital sensor's tendency toward oversaturation from turning a beautiful sky into a poster.
What Goes Wrong With Sunset Edits
The most common failure is saturation stacking. The photographer increases Vibrance because the sky looks good, increases Saturation because it looks even better, pushes Temperature warmer because sunsets are warm, and adds warm Colour Grading in the highlights. Each individual decision seems reasonable in isolation. Together they produce a sky with no tonal separation left, where the orange and red have merged into a single flat band.
The second failure is clipping in the orange channel specifically. Sunset skies push the Red and Orange channels far higher than any other subject. When a single channel clips while others remain in range, that area stops responding to HSL adjustment entirely. How to Avoid Digital Color Clipping covers how to detect and prevent this, and it matters more in sunset photography than in almost any other condition.
The third failure is losing the foreground. Sunset photographs typically have a bright sky and a much darker foreground. Editing for the sky leaves the foreground as a black silhouette. Editing for the foreground blows the sky out. Both need attention, in the right order.
Step One: Protect the Sky First
Pull Highlights to negative 40 through negative 65. Sunset skies contain the brightest values in the frame and they need substantial protection before anything else happens. Reduce Whites by negative 20 through negative 40.
Check the individual channel histograms after this step rather than only the combined RGB histogram. The Red channel in a sunset photograph is frequently pushed against the right wall while Green and Blue remain comfortably in range. If Red is clipping, reduce Exposure slightly and pull Highlights further before continuing.
The technical reason highlight protection produces the film quality rather than simply darkening the sky is covered in Highlight Roll-Off Explained, which explains how film compresses bright values gradually.
Step Two: Recover the Foreground
Lift Shadows to positive 20 through positive 45. Sunset foregrounds are typically several stops darker than the sky and need genuine recovery. Lift Blacks to positive 5 through positive 12 for the film shadow floor.
Resist lifting Shadows beyond positive 50. Above that point the foreground begins to look artificially flat and noise in the dark areas becomes visible. If the foreground still reads too dark at positive 45, the exposure at capture was weighted too heavily toward the sky, and a graduated filter at capture would solve it better than post processing can.
Step Three: White Balance for Warm Without Orange
The instinct with sunset photography is to push Temperature warmer because the scene is warm. This is usually wrong. The ambient is already warm. Adding more Temperature warmth pushes the whole frame toward orange including elements that should stay neutral.
Set Temperature to 5,200 to 5,700K. This preserves existing warmth without amplifying it. Set Tint to positive 5 through positive 10.
If the sky reads as too orange after this, the issue is saturation rather than temperature. Reduce Orange Saturation rather than cooling the Temperature, which would neutralise the warmth you actually want to keep.
Step Four: Colour Channel ManagemenT
Orange Saturation should be reduced by negative 12 through negative 25. This is counterintuitive in a subject where orange is the point, but the reduction is what creates tonal separation within the orange range. Fully saturated orange has no internal variation. Slightly reduced orange has gradation between deeper and lighter areas.
Increase Orange Luminance by positive 5 through positive 12 to keep the sky bright and luminous after the saturation reduction.
Reduce Red Saturation by negative 10 through negative 20 for the same reason. The deepest sunset reds need internal separation to read as dimensional rather than flat.
Blue Saturation in the upper sky should be reduced by negative 8 through negative 18. The blue in a sunset sky is often more saturated than it appears, and reducing it prevents the cool upper band from competing with the warm lower band.
Yellow Saturation reduction of negative 8 through negative 15 handles the transitional zone between the orange sky and remaining daylight.

Step Five: Tone Curve and Colour Grading
Lift the shadow point to output 15 through output 22. Build a gentle midtone S-curve. Pull the highlight point to output 220 through output 230 for soft compression of the brightest sky areas. The specific curve construction is covered in Understanding Color Curves for Film Editing.
Colour Grading requires restraint in sunset photography specifically. The scene already provides the colour. Highlight Hue at 40 to 50 with Saturation at only 4 to 8, notably lower than for standard daylight photography, adds cohesion without adding to the existing warmth. Shadow Hue at 210 to 225 with Saturation 3 to 6 adds separation in the foreground shadows without introducing visible teal.
Presets That Suit Sunset Photography
The California Archive is calibrated for warm outdoor conditions including golden hour and sunset. C5 and C6 handle the warmest end of the range with the highlight protection sunset photography needs.
The Vesper Archive V5 Golden Velvet suits sunset photography where the warm quality should read as rich and dimensional rather than restrained.
For the broader treatment of warm outdoor editing including the calibration differences between golden hour and full sunset conditions, Best Lightroom Presets for Golden Hour Photography covers when each approach applies.
FAQ
Should I expose for the sky or the foreground?
Expose for the sky and recover the foreground in post. Clipped sky highlights cannot be recovered. Dark foregrounds usually can, within about three stops of recovery.
Why does my sunset look flat after editing?
Usually because saturation was reduced without tonal separation being built in the Tone Curve. The saturation reduction creates room for gradation. The curve is what actually produces the dimensional quality.
Does the film sunset approach work on phone photographs?
Yes, with reduced preset strength and less aggressive Highlights recovery, since phone HDR processing has already compressed the range before the file reaches Lightroom.
Try a warm film base on your sunset photographs:
Download the free Analog Film preset and apply the Orange and Red channel reductions described above.
For collections calibrated for warm outdoor and golden light, the California Archive covers the full warm range. The b at $89 includes it alongside every other collection.
