How to Edit Indoor Photos in Lightroom (2026) — Complete Guide
Indoor photography is technically the most demanding editing scenario. The lighting is warm, often mixed, frequently too dark, and rarely consistent across a room. Most preset guides assume outdoor natural light. This guide specifically covers indoor editing in Lightroom.
The indoor editing challenges
Warm orange color cast. Tungsten and warm LED bulbs have a color temperature of 2,700-3,200K versus daylight at 5,500K. The result is photos that look orange unless white balance is corrected first.
Mixed light sources. A room lit by a mix of tungsten lamps, a window, and a phone screen has no single correct white balance. You need to choose the dominant light source and correct for that.
Low light and noise. Indoor photos at ISO 800-3200 have significant digital noise that needs noise reduction before adding grain or other effects.
Inconsistency across a room. Different corners of the same room can have dramatically different color temperatures and brightness levels, making batch editing challenging.
Step 1 — White balance is everything for indoor editing
This is the most important adjustment for indoor photos. Wrong white balance creates orange skin and yellow walls that no preset can fix because you are working on top of the color error.
For tungsten lighting (warm yellow bulbs): Temperature: -600 to -1,200 from Auto (typically landing around 2,800-3,200K) Tint: +10 to +20 to compensate for slight green cast in tungsten
For warm LED lighting (most common modern indoor): Temperature: -400 to -800 (landing around 3,500-4,500K) Tint: +5 to +15
For mixed tungsten and window light: Expose for the subject near the window. Set white balance for the window light (5,000-5,500K). Let the tungsten areas read warm naturally.
For fluorescent lighting (offices, some kitchens): Temperature: neutral to slightly cool (5,000-5,500K) Tint: +15 to +30 to reduce the green cast fluorescent lights produce
Step 2 — Lift exposure and open shadows
Indoor photos are typically darker than outdoor. Lift Exposure: +0.5 to +1.0 for most indoor scenarios.
Then immediately protect what you lifted. Highlights: -25 to -40 (lamps and windows in the frame clip easily indoors). Whites: -15 to -25.
Lift Shadows: +20 to +35 to open dark corners and bring out detail in darker areas of the room.
Step 3 — Noise reduction before adding grain
Indoor ISO noise appears differently from film grain and looks bad when combined. Reduce noise first, then add grain separately.
Detail panel: Luminance Noise Reduction +30 to +50 depending on ISO. Detail: 50-60. Contrast: 50.
After noise reduction, add film grain through the Effects panel if you want grain as part of the look.
Step 4 — Choose the right preset for the atmosphere
The mood of the indoor space should guide your preset choice.
Warm, cozy interiors (cafés, home, restaurants): Moody Film Archive presets or Vesper Archive warm presets. M4 or M5 for atmospheric depth. V4 or V6 for warm cinematic quality.
Clean, neutral interiors (modern homes, offices, studios): Analog Film Archive or Bright and Clean Archive. A6 for clean film quality. S1 or S3 for editorial brightness.
Dark, dramatic interiors (bars, moody restaurants, candlelit scenes): Moody Film Archive. M5 or M6. Lift Blacks slightly (+5 to +10) to preserve shadow detail even in very dark scenes.
Wedding and event venues: Essence Archive. E4 Balanced Classic for most venue lighting. E8 Dark Heritage for very dark reception lighting.
Step 5 — Handle window light separately with masking
Indoor photos with a window in the frame face a specific challenge: the window area is dramatically brighter than the rest of the room. Masking solves this.
In Lightroom Mobile or Classic, use a Radial or Gradient mask to select the window area. Then pull Highlights and Exposure down specifically in that selection, independent of the rest of the room.
This lets you expose correctly for both the interior and the window in the same edit rather than choosing one or the other.
Editing specific indoor scenarios
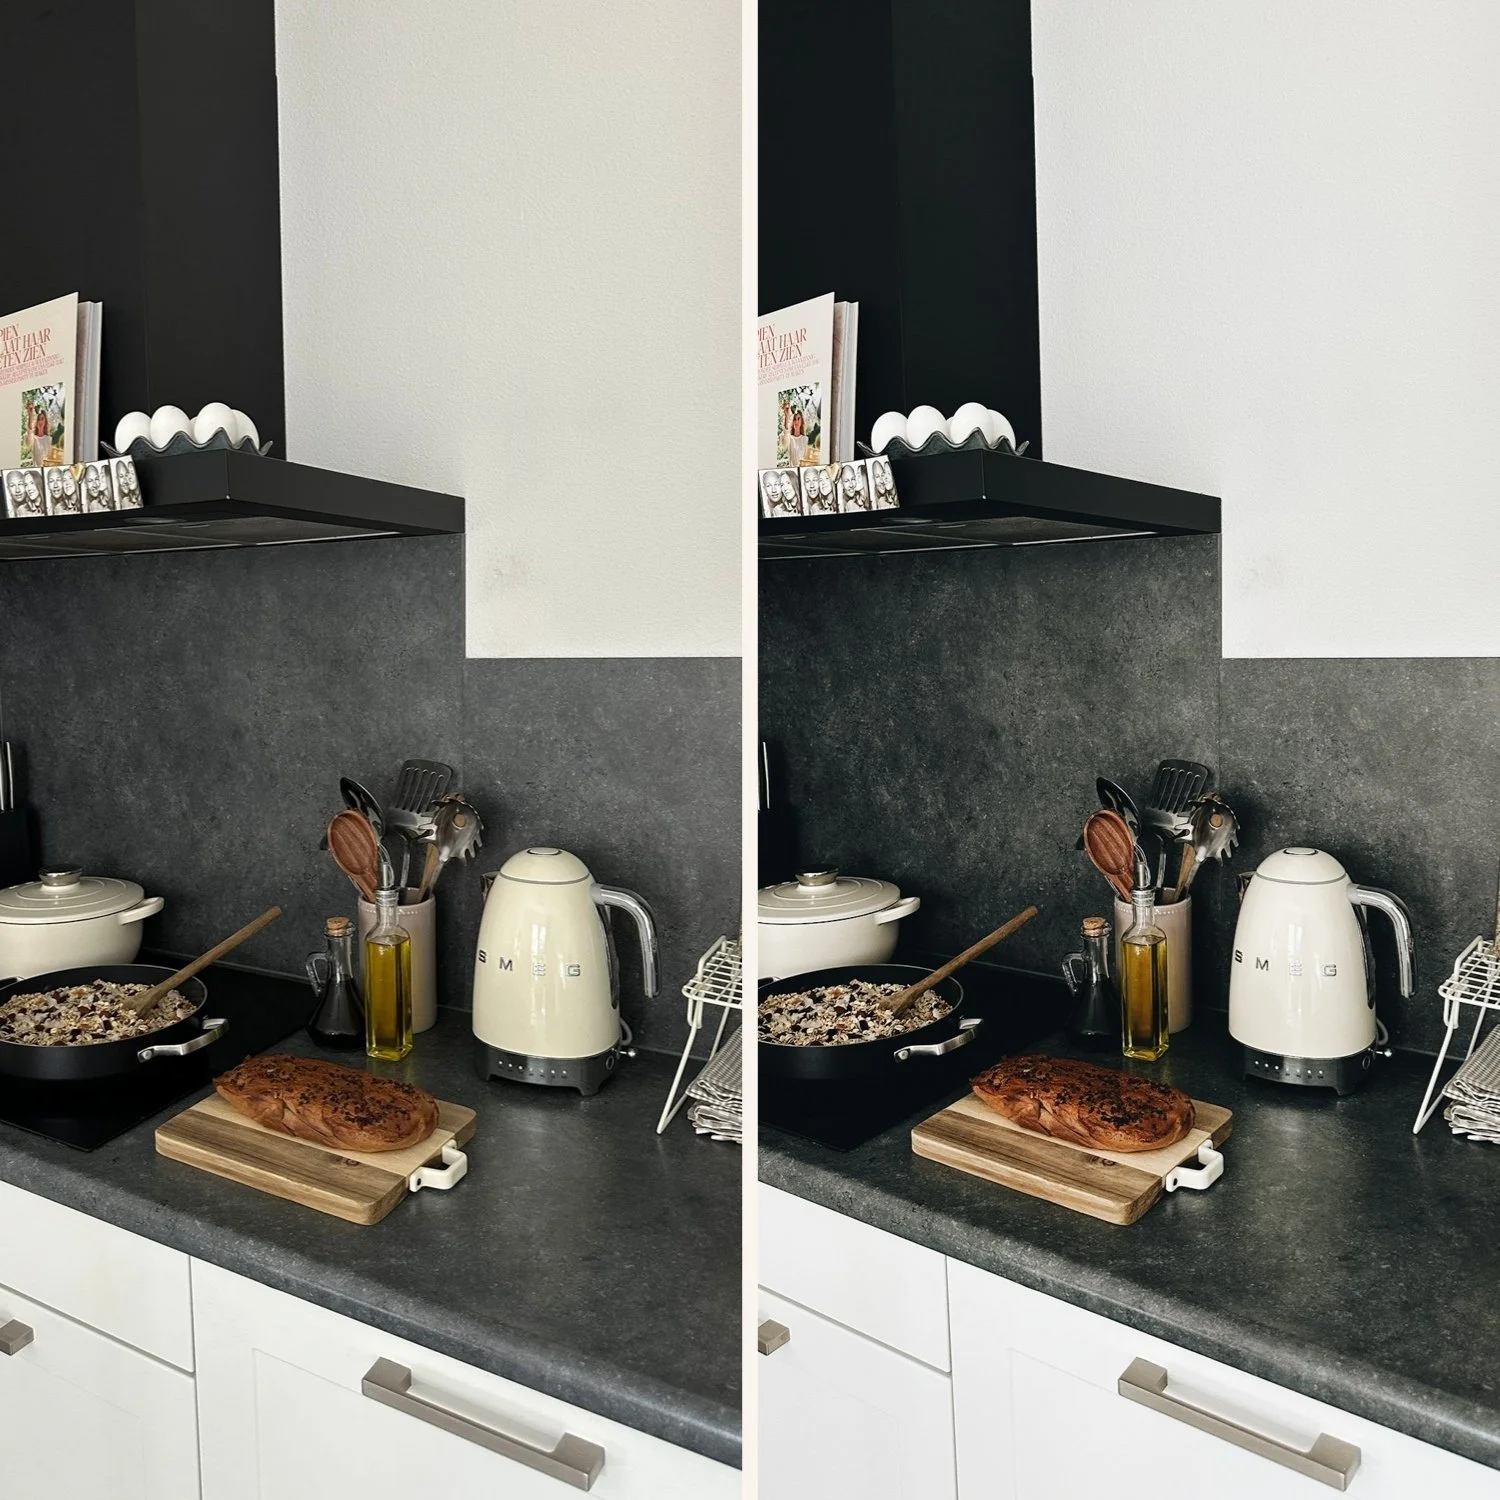
Home interiors and lifestyle. Set white balance to the dominant lamp temperature. Use A6 for a clean, natural look or V2 for a warmer, cozier quality. Lift Shadows significantly (+25) to open dark corners. Add subtle warm Color Grading to shadows (hue 35, saturation 12).
Restaurant and café photography. The warm, atmospheric quality of these spaces works well with moody film presets. Do not over-correct the warm color cast. A restaurant at 3,500K should feel warm in the final edit. M4 or M5, white balance corrected to 3,500-4,000K rather than all the way to neutral.
Portrait in indoor natural light (window). Set white balance to the window light (5,000-5,500K). Use E6 Soft Heritage or A6. Pull Highlights on the bright window side (-35 to -45). Lift Orange Luminance (+12 to +15) for natural skin.
Event photography with mixed artificial light. Set white balance to neutral as a starting point. Apply E4 Balanced Classic. This preset is specifically calibrated for mixed lighting. Then batch paste and fine-tune white balance per photo individually.
Free preset for indoor photography
The free A6 preset is the most versatile starting point for indoor editing. It is calibrated on clean neutral tones that work after proper white balance correction.
FAQ
How do I fix orange photos from indoor lighting in Lightroom?
Set Temperature to around 3,000-3,500K for tungsten bulbs and 3,500-4,500K for warm LED. Cool the Temperature until white walls read as white. Then apply your preset on top of the corrected white balance.
Can I use outdoor film presets on indoor photos?
Yes, but correct white balance first. A warm outdoor preset applied to an already orange indoor photo creates very orange results. Fix the foundation, then apply.
Why do my indoor edits look inconsistent even after using the same preset?
Usually because different photos in the same space were shot under slightly different light sources or at different white balance settings. Edit white balance per photo individually for indoor shots rather than batch pasting it.