Best Lightroom Presets for Wedding Photography
Best Lightroom Presets for Wedding Photography
Wedding photography is one of the most technically demanding editing scenarios in photography. You are editing 400 to 800 photographs across six to eight hours of wildly different lighting conditions, outdoor ceremonies in afternoon sun, shaded bridal party portraits, indoor receptions under warm venue lighting, and low light evening photography, and the finished gallery needs to look like it was shot and edited in one coherent visual style. It often needs to be delivered within days of the wedding.
A preset that works well in one condition and poorly in another cannot serve this requirement. A preset that flatters one skin tone and distorts another cannot anchor a gallery that includes a couple, a wedding party, and dozens of guests across the full range of skin tones. Understanding what wedding photography specifically needs, both from a preset system and from a workflow, is the most direct path to a gallery that reads as professional rather than inconsistent.
This guide covers the complete picture: what a wedding preset system must do, the full editing workflow from culling to delivery, the specific settings for every lighting scenario in a wedding day, and how to keep six hours of changing light looking like one gallery.
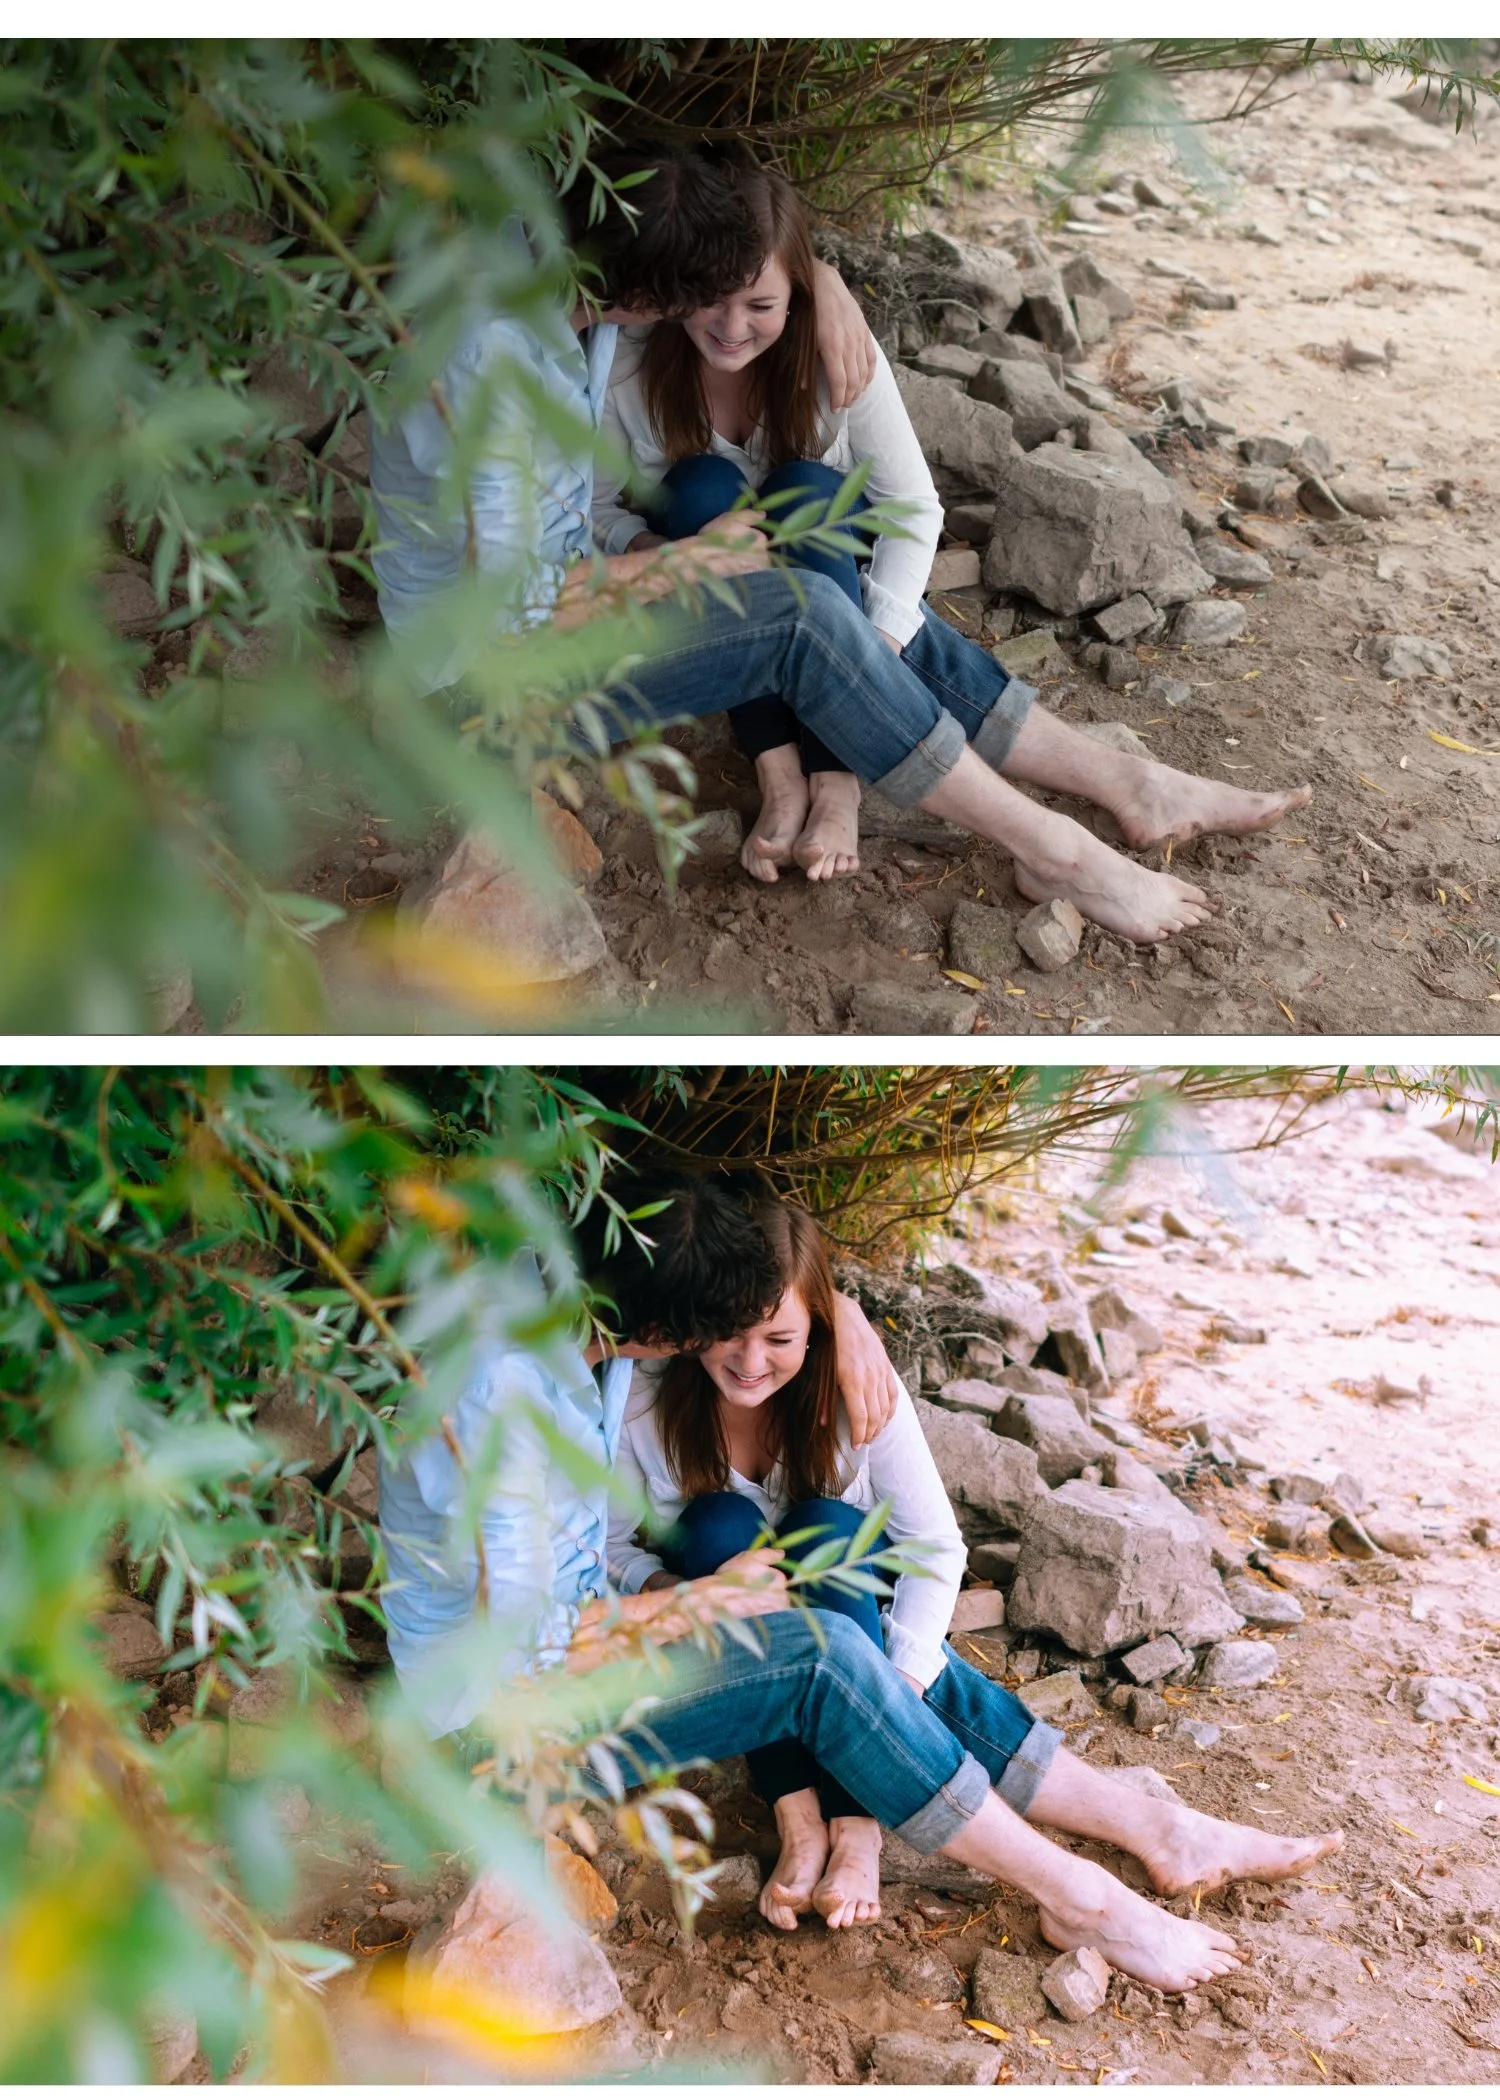
The Four Requirements a Wedding Preset System Must Meet
Skin first calibration. A wedding gallery includes photographs of many people, not a single primary subject. Couples, families, bridal parties, and guests all appear in the same gallery, and a preset that flatters one skin tone must also handle the rest consistently. This requires specific Orange channel management: Saturation reduced in the negative 10 to negative 20 range, and Luminance increased in the positive 8 to positive 15 range. The Saturation reduction prevents the vivid orange that warm ambient light creates on warm skin tones. The Luminance increase keeps skin bright and dimensionally present despite the reduced saturation. Without both adjustments together, skin either looks orange or flat, and neither is acceptable when skin rendering is the primary deliverable.
Highlight protection. Wedding photography consistently produces near clipping highlights on white dresses and veils in outdoor light, on reflective venue surfaces, and in bright ceremony backgrounds. A film preset needs a properly protected Tone Curve highlight point to keep these elements luminous rather than clipping to featureless white.
Versatility across the lighting conditions of a wedding day. Outdoor ceremony light, overcast portrait sessions, and indoor reception ambient are three distinct conditions that each need appropriate calibration. A well structured wedding preset system covers all three from presets in the same collection, so photographs from each part of the day read as belonging to one gallery.
Consistency at high volume. Wedding editing has to scale to 600 photographs without quality or consistency declining across the session. Preset based batch workflows handle this in ways that manual per photograph editing simply cannot sustain across eight hours.
The White Dress Problem
The white dress is the single most demanding technical element in wedding photography and it deserves specific attention on its own.
A wedding dress in direct outdoor sun frequently sits at or beyond the clipping point in the raw file. Once clipped, the fabric detail, the lace texture, and the beadwork are permanently gone, and no preset recovers them. This is why highlight protection matters more in wedding photography than in almost any other genre.
The practical approach is to pull Highlights to negative 30 through negative 50 before applying the preset on outdoor ceremony and portrait photographs. This creates the tonal range the Tone Curve needs to produce a soft roll off rather than a flat white shape. Check the histogram on every dress photograph. If the right edge is stacked against the wall after Highlights recovery, the exposure at capture clipped and the detail cannot be restored. Underexposing dress shots by a third to half a stop at capture solves this permanently.
The Complete Wedding Editing Workflow
Professional wedding editing is a system, not a sequence of individual edits made in the order the photos happen to sit in. A system is designed upfront for consistency. Editing photo by photo in chronological order produces results that drift as the lighting changes without you noticing.
The system has five phases.
Phase 1: Cull
Reduce 800 photographs to around 400 before any editing starts. Remove duplicates, missed focus shots, and frames where the moment was not captured cleanly.
In Lightroom Classic, use Pick and Reject flags. Press X to reject, P to pick, and the arrow keys to advance. Worked systematically, a wedding gallery culls at roughly five to ten minutes per hundred photographs. In Lightroom Mobile, star ratings or flags serve the same purpose.
Cull ruthlessly. A couple sees 350 great photographs as a complete gallery. They see 700 photographs as too many to look through, even if all 700 are individually decent.
Phase 2: Group by Lighting
Sort the culled set into lighting groups rather than keeping chronological order. Most weddings break down into six groups.
Getting ready, usually indoor window light, soft and slightly warm, with varied backgrounds and subject distances. Ceremony outdoor, strong sun or overcast, bright overall, with the white dress as the main technical challenge. Ceremony indoor, mixed artificial and natural light, church or venue lighting, often dark with spotlit areas. Portraits between the ceremony and the reception, usually outdoor in the best available light. Golden hour, the thirty minutes with the best light of the day, usually the couple portraits, and worth treating as its own group. Reception, low light, mixed artificial sources, flash photography, and candlelit scenes.
Phase 3: Edit by Group
Edit one reference photograph per group, batch paste the settings to the rest of the group, then fine tune individual frames. This is where the specific preset and setting combinations for each lighting scenario apply.
Getting ready. Set white balance to the dominant light source in the room, typically 4,500 to 5,000K indoors. Apply E6 Soft Heritage or A6. Pull Highlights to negative 25. Check skin tones on the bride and the bridal party specifically, since window light varies significantly room to room.
Ceremony outdoor in bright sun. Pull Highlights to negative 40 through negative 50 immediately, and Whites to negative 20. This is the single most common place wedding galleries go wrong. Set white balance to around 5,500K. Apply E1 Warm Classic or E2. Check that the wedding dress is not clipping before moving to the next photograph.
Ceremony indoor. Set white balance manually per venue rather than trusting auto white balance, since churches frequently mix tungsten with natural light through stained glass. Set to neutral first, then fine tune against a known reference if one is available. Apply E4 Balanced Classic. Lift Shadows to positive 20 for the darker interior areas.
Portraits and golden hour. Apply E7 Golden Warm or A4. Push white balance slightly warm, roughly 200K above neutral, and pull Highlights to negative 30 to protect the natural warm light rather than flattening it. These are usually the strongest photographs in the gallery and deserve the most individual attention of any group.
Reception. Apply E8 Dark Heritage or M4. Lift Blacks to positive 10 through positive 15 for the low light. Check skin tones specifically, since flash creates colour casts that vary by flash setup and by how far the subject is from the flash.
Phase 4: Refine the Key Images
Before the final consistency check, pull out the thirty to fifty photographs that will anchor the gallery: the ceremony moment, the first look, the portraits the couple will print and frame, and the detail shots destined for the vendor gallery. These earn individual attention beyond the batch treatment that the rest of the gallery gets.
A radial gradient to lift a face relative to its background. A linear gradient to control a bright window behind the subjects during getting ready coverage. A targeted adjustment wherever one element needs correction that a global edit would apply to the whole frame instead. This is where the time saved in the batch stages gets reinvested, and it is the difference between a competently edited gallery and an exceptional one.
Phase 5: Consistency Pass
After editing every group and refining the key images, use Lightroom's Survey view to compare eight to ten photographs spanning the full day side by side, rather than relying on grid view alone.
Look for obvious outliers, photographs that are noticeably brighter, darker, warmer, or cooler than their neighbours in the same group. Open each outlier individually and adjust Exposure or Temperature to bring it back in line.
A golden hour photograph should look warmer than a ceremony photograph. That is correct and intentional, the light genuinely changed. A ceremony photograph that is brighter than every other ceremony photograph around it is an outlier that needs correcting, because nothing about the light changed to explain the difference.
Pay particular attention to the transitions between groups. The last photograph of the outdoor ceremony and the first photograph of the indoor ceremony should look intentionally different, because the light changed, but still related, because the underlying colour philosophy stayed the same. If those two frames look like they belong to two different weddings, the transition needs work.
Which Collections Work Best for WeddingS
The Essence Archive is built specifically as a gallery system for wedding and portrait photography. Eight presets, E1 Clean Warm through E8 Dark Heritage, cover the full range of wedding lighting within one consistent warm philosophy. E1 and E2 handle outdoor daylight where natural skin rendering is the priority. E4 and E5 handle the warmer conditions of indoor venues. E7 and E8 provide the deeper, more atmospheric quality that low light and evening reception photography needs. Using the Essence Archive across a full wedding day means the outdoor ceremony and the indoor reception both read as part of the same visual identity, because every preset in the collection shares the same underlying colour calibration.
The Vesper Archive offers a slightly more contemporary warm film approach for photographers whose style is more modern and editorial than heritage film. V1 and V2 suit outdoor portrait work, V4 suits indoor reception coverage, and V6 suits atmospheric low light moments.
The Glow Portrait Archive is the most portrait specific option, for photographers who prioritise the quality of skin rendering above every other consideration. The soft contrast, warm midtone glow, and skin optimised calibration produce the luminous bridal portrait quality that is the most demanding test of a preset's capability. For wedding work that is primarily portrait focused rather than documentary in style, the Glow Portrait Archive is worth considering as the primary collection rather than a supplement.
For indoor reception specifically, the Moody Film Archive M6 Warm Matte provides a natural warm quality suited to candlelit and warm LED venue photography, with a soft highlight roll off that manages the brightness variation venue lighting creates.
A Practical Three Preset System
The most efficient approach uses three presets from the same collection, applied to their matching condition group in batch after white balance correction for that group. For the Essence Archive specifically: E1 or E2 for outdoor daylight, E3 for overcast or shade where the warmer outdoor presets would look mismatched, and E5 or E6 for indoor reception. This is more consistent than forcing one preset across every condition, and more efficient than choosing a different preset for every individual photograph.
Skin Tones Across a Diverse Wedding Party
Wedding parties routinely include guests across the full range of skin tones in the same frame, and a single Orange channel setting does not serve everyone equally. As a baseline, Orange Luminance in the positive 12 to positive 18 range works across most skin tones once the preset's Saturation reduction is in place. For darker skin tones specifically, lift Orange Luminance further, into the positive 20 to positive 25 range, to maintain richness and presence rather than letting the preset's calibration flatten it. After batch applying a group, check that the range of skin tones present in any single group photograph all read as natural together, and make local adjustments through Radial Gradients on individuals who need a different Luminance value than the rest of the group.
How to Edit Natural Skin Tonescovers the four variables that determine skin rendering and how to calibrate each independently, which is worth understanding before relying on a single Orange Luminance number across an entire gallery.
Once the batch pass is applied, review portraits and any photograph where a face is prominent, and treat these numbers as a starting point rather than a fixed answer. Where skin still reads slightly flat within the film palette, add a further positive 5 to positive 10 Orange Luminance locally. Where skin reads too warm, most often in reception photographs where the venue's own warm light stacks with the preset, reduce Orange Saturation by an additional negative 5.
Indoor Reception Editing in Practice
Indoor reception photography is where most wedding preset problems actually occur, and where careful workflow makes the largest difference to the finished gallery. Warm tungsten and LED venue lighting creates an extremely warm ambient that, combined with a warm preset, can produce orange skin and yellow whites without careful management. The Orange Saturation reduction that works for outdoor editing needs to increase by an additional negative 5 to negative 8 for most reception photographs, and Yellow Saturation should reduce to between negative 10 and negative 20 to prevent warm whites shifting yellow.
White balance correction matters more here than for outdoor work. Venue lighting varies between roughly 2,700K warm tungsten and 4,000K warm LED, and many venues mix both sources in the same room. Automatic white balance means Temperature values drift from photograph to photograph within the same reception, which breaks gallery consistency before editing even starts. Correcting all reception photographs to a consistent target Temperature range before applying the preset produces a noticeably more consistent result. A practical target for warm reception venues is 3,800 to 4,200K with Tint at positive 6 to positive 10.
Tint matters more in venue lighting than most photographers account for. LED venue lighting frequently carries a green cast that Temperature adjustment alone will not correct, and an uncorrected green cast produces skin that reads slightly sickly regardless of how well the Orange channel is handled. Color Temperature vs Tint Deep Divecovers why the green magenta axis needs independent attention rather than being folded into Temperature alone.
Flash Photography at Receptions
Flash adds a specific cool, neutral light that interacts with skin differently than natural or ambient venue light. Set white balance manually to match your flash's colour temperature before applying any preset rather than trusting the camera's automatic reading, which will average the flash against the warm ambient and land somewhere that suits neither. A single grey card reference photograph taken with the flash at the start of the reception is worth having, since it gives you an exact correction target for the rest of the group rather than an estimate.
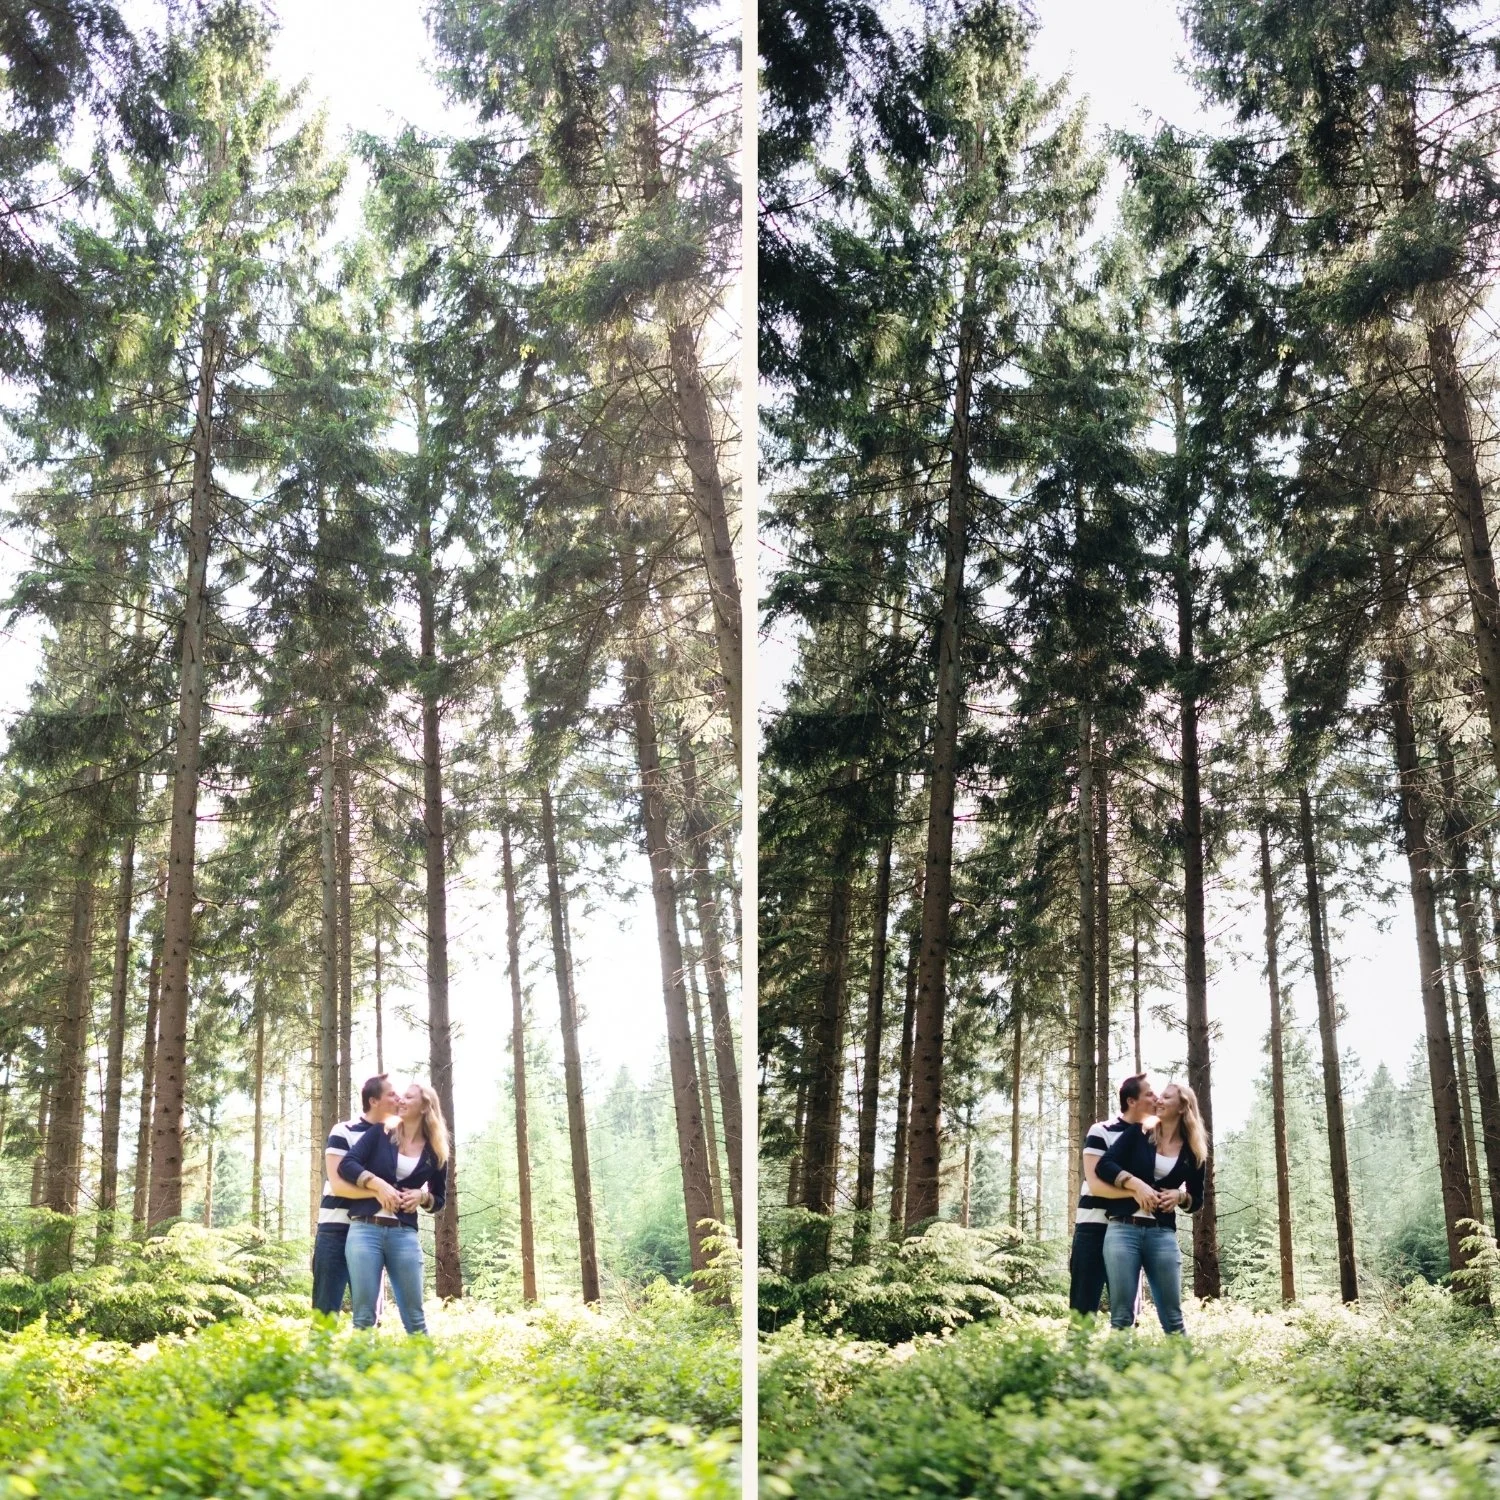
Black and White for Wedding Galleries
Most wedding galleries include black and white photographs alongside colour, and the monochrome conversion deserves the same consideration as the colour work rather than being an afterthought filter.
A black and white wedding photograph should have genuine tonal depth without the dramatic contrast suited to street or documentary photography. Skin should retain gradation rather than flattening. The dress should hold detail in its brightest areas. Shadows should have presence without crushing to solid black.
The Luxury Archive LV2 Refined Black and White is calibrated for exactly this register: quiet, editorial, and timeless rather than dramatic. For specific moments where a bolder monochrome genuinely suits the photograph, Best Black and White Lightroom Presets covers the full range from refined through expressive.
Maintaining Cohesion Across an Entire Wedding Day
The gallery delivered to a couple should read as a single coherent body of work, not a collection of photographs from different parts of the day that happen to have been edited differently. This cohesion comes from consistent editing logic across radically different conditions, not from optimising each photograph individually in isolation.
The practical approach is establishing two or three preset foundations for the day rather than one: one for outdoor warm conditions, one for indoor warm conditions, and one for overcast or shade if the day includes it. Apply white balance correction for each condition group, then apply the matching preset to each group in batch. The visual identity stays consistent because the same calibration philosophy runs through the whole gallery, while the technical adaptation to each condition is handled by white balance and the choice of preset variant rather than by manual recalibration on every single photograph.
Exporting and Delivering the Gallery
Wedding photographs are typically delivered through an online gallery service, and the export settings matter for how the finished work actually looks once a couple opens it.
Format JPEG, Quality 90 percent, colour space sRGB, long edge dimension around 3,000 pixels, which is sufficient for prints up to A3, and resolution set to 300 DPI. Create a saved export preset in Lightroom Classic named something like Wedding Delivery with these settings built in, so the entire gallery exports correctly in one click rather than being reconfigured every time.
Export the client gallery at that full setting, then run a second export at 2,048 pixels on the long edge for anything headed to social sharing or the vendor gallery. The smaller size uploads faster and is the appropriate resolution for screen viewing, while the client keeps the print capable originals.
How Long This Actually Takes
With a systematic batch workflow, 400 culled photographs take roughly four to eight hours to edit to a professional standard. The same gallery edited without a system, photograph by photograph in whatever order they happen to sit in, can take twenty or more hours for an equivalent result. The time difference lives entirely in the workflow, not in editing skill.
Roughly 80 percent of photographs in a well organised gallery need only Exposure and white balance adjustment once the group batch paste is applied. The remaining 20 percent, generally the golden hour portraits and any photograph flagged as an outlier in the consistency pass, need individual attention.
FAQ
How do I handle photographs with very different skin tones in the same group shot?
Calibrate the preset for the group using the primary subjects as the reference, then use local adjustments through Radial Gradients for individuals who need a different Orange Luminance or Saturation value than the rest of the group.
Should wedding photographs always have warm tones?
Warm tones suit most wedding aesthetics because warmth communicates intimacy and celebration. Cool or neutral aesthetics work for contemporary editorial style weddings where a more controlled, restrained look suits the couple's own aesthetic. The right temperature is the one that matches the couple's vision and your visual identity as the photographer.
How many presets do I actually need for a full wedding day?
Three preset foundations cover most full day weddings: one for warm outdoor, one for overcast or shade, and one for indoor warm ambient. Some photographers add a fourth for low light evening or documentary moments. Each preset applies in batch to every photograph in its lighting category.
What preset strength should I use?
Full strength on camera RAW files. For photographs from a second shooter working on a phone, or from guest phone submissions, apply at 80 to 85 percent to compensate for in camera processing.
How do I keep the getting ready photographs consistent with the rest of the gallery?
Getting ready coverage is usually indoor window light, which sits between the outdoor and reception conditions. Correct white balance to 4,800 to 5,400K and use the outdoor preset rather than the reception preset, since window light is closer to daylight than to venue lighting.
How long should editing a full wedding gallery take?
Four to eight hours for 400 culled photographs with a systematic batch workflow. Without a system, the same result can take twenty or more hours.
How many photographs should I deliver from a wedding?
300 to 450 is the professional standard for a full wedding day. Beyond 500, a gallery starts to feel unedited. Below 250, key moments are usually missing.
Do I need to edit every photograph individually?
No. With batch editing by lighting group, roughly 80 percent of photographs need only Exposure and white balance adjustment after the group batch paste. Only the remaining 20 percent need individual attention.
Try the warm film wedding approach on your own photographs:
Download the free Analog Film preset and test it on portrait photographs with varied skin tones to evaluate the Orange channel calibration before investing in a full wedding collection.
For the most skin focused wedding film collections, the Essence Archive and the Glow Portrait Archive are both calibrated specifically for portrait and wedding work. The Studio Archive includes both alongside every other collection for $89.
Related guides:
