How to Edit Travel Photos in Lightroom — Complete Guide (2026)
How to Edit Travel Photos in Lightroom — Complete Guide (2026)
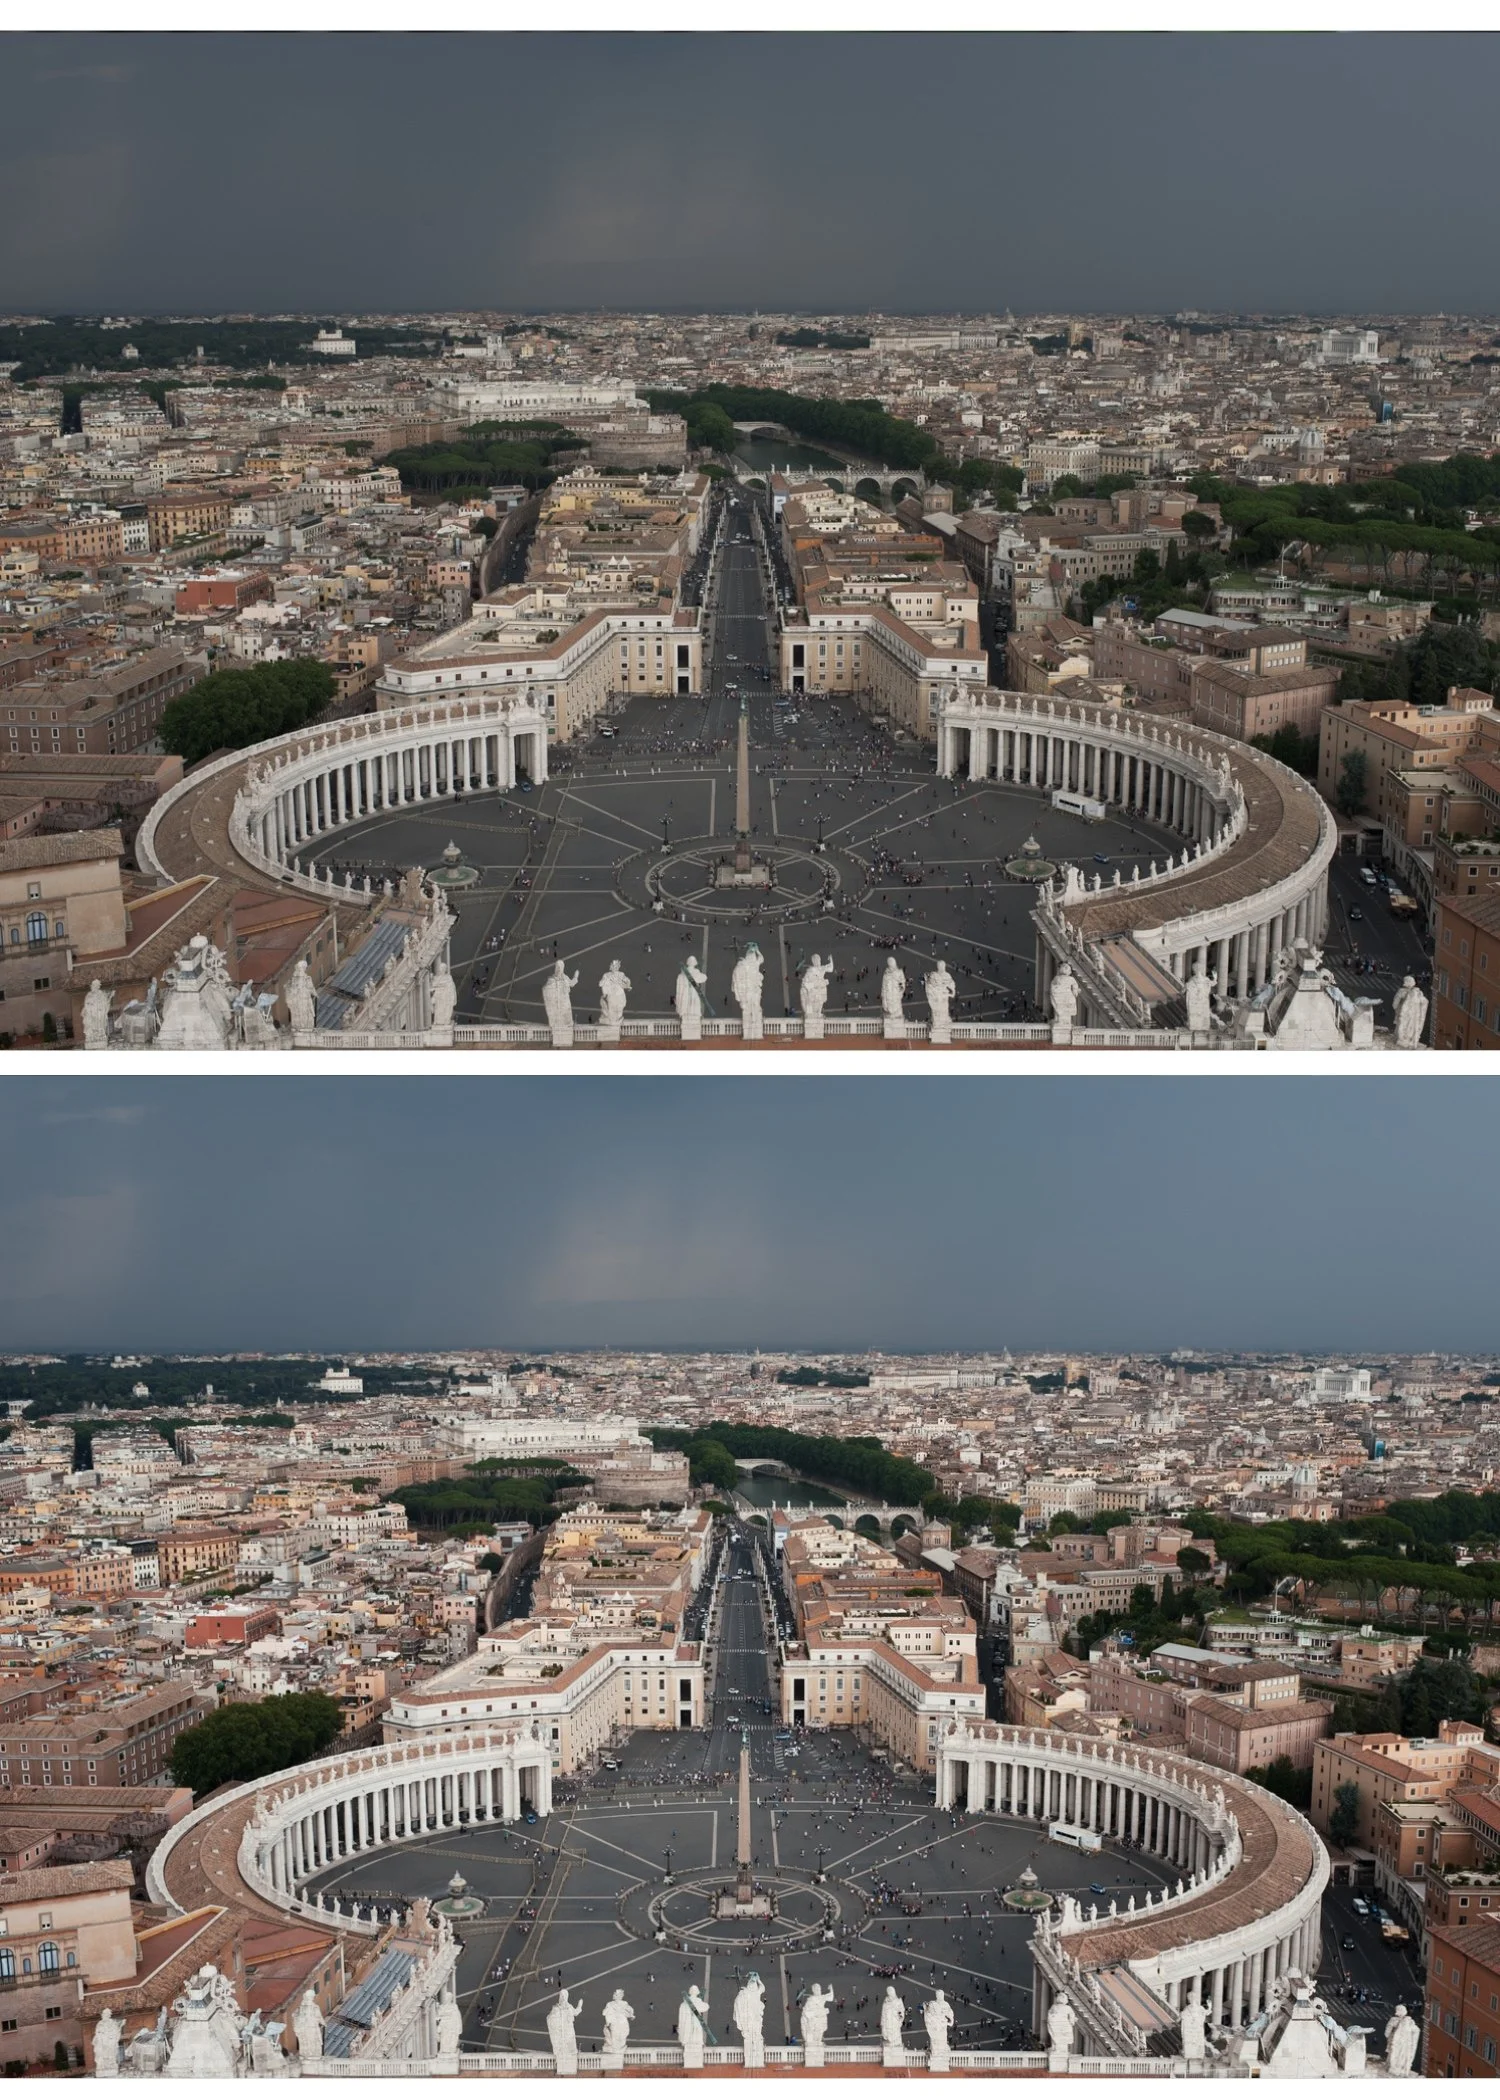
Travel photography editing has a specific challenge that most other editing does not: extreme lighting variation. A single trip produces photos shot in bright noon sun, overcast grey skies, golden hour, indoor restaurant light, and blue dusk light. All of these need to look like they belong to the same gallery.
This guide covers the complete workflow for editing a travel gallery in Lightroom, from importing your first photo to exporting a consistent set.
The travel editing challenge
Most photographers edit travel photos one by one, adjusting each photo individually and ending up with a gallery that looks like it was edited by different people on different days. The solution is a system that handles lighting variation consistently.
The travel editing system has three components:
A preset family. Not one preset, but a small set of presets on the same color philosophy for different lighting conditions. All built on the same foundation so photos look related even when different presets are applied.
A fixed workflow order. The same sequence applied to every photo: exposure, white balance, preset, fine-tune. Consistency in order creates consistency in results.
Grouping by light. Edit by lighting condition, not by chronological order. All bright outdoor photos together. All overcast photos together. All indoor photos together. Apply the appropriate preset variant to each group, then fine-tune individually.
Step 1 — Sort your photos by lighting condition
Before editing a single photo, sort your import into groups.
Group 1: Bright outdoor daylight. Strong sun, clear sky, high contrast scenes.
Group 2: Overcast and soft light. Cloudy days, open shade, soft diffused conditions.
Group 3: Golden hour. Late afternoon warm light, low sun angle.
Group 4: Indoor and artificial light. Restaurants, museums, indoor markets, hotels.
Group 5: Dusk and low light. Blue hour, night scenes, candlelit scenes.
You do not need to use a different preset for each group, but you need to set different white balance starting points and different exposure corrections.
Step 2 — Edit your best photo from each group
Choose the strongest, most representative photo from each lighting group. Edit it to your intended look: correct exposure and white balance, apply preset, fine-tune.
This photo becomes the reference for the entire group. Every other photo in the group will be batch-pasted with these settings.
Step 3 — Preset selection by lighting condition
Bright outdoor daylight. Clean, vibrant analog looks work best. A1, A6, C1, C5, or any clean warm preset. Pull Highlights to -35 to -45 because bright travel scenes clip fast.
Overcast outdoor. Neutral or slightly warm presets that add life to flat grey light. A6, E4, or V1. Add Temperature +100 to +200 after applying to compensate for cool overcast light.
Golden hour. Warm presets calibrated for late-day light. C7, A4, E7, or V5. Reduce Orange Saturation by -5 after applying to prevent combined warmth going too orange.
Indoor artificial light. Neutral presets with warm correction. A1, A6, or E4. Set Temperature manually to around 3,200-3,500K for tungsten. 4,500K for LED.
Dusk and low light. Moody presets with lifted shadows. M4, M5, or V4. Lift Blacks to +10 to +15 to preserve shadow detail.
Step 4 — Batch the group
After editing the reference photo, select all photos in the same lighting group. Copy settings from the reference photo and paste to the entire group.
Then open each photo individually and make only two adjustments: exposure and white balance. Everything else carries across from the reference.
This approach edits a 400-photo trip gallery in a fraction of the time individual editing takes.
Step 5 — Consistency check across groups
After editing all groups, view your gallery in grid view and scan for photos that look obviously different from their neighbors. Common inconsistencies:
Color temperature mismatches. One photo warm, the next cool, in the same location. Usually caused by inconsistent white balance correction. Open the cooler or warmer outlier and adjust Temperature.
Exposure jumps. Bright photo next to dark photo from the same scene. Usually because the batch paste applied the same exposure correction to photos with different starting exposures. Open the outlier and adjust Exposure.
Preset mismatch. A photo from a golden hour walk that ended up in the daylight group and got the wrong preset. Check and move to the correct group.
Travel editing for specific scenarios
Architecture and landscapes. Pull Highlights hard (-40 to -50) for sky detail. Reduce Green Saturation (-15 to -20) for organic rather than digital foliage. A6 or C1 presets work well.
Street photography. Moody film presets suit street work. M4 or V4 with Clarity at -5 to -10 for the specific film street photography quality.
Food and market photography. California Archive presets for vibrant, appetizing color. C2 or C5. Slightly warm white balance (+100 to +200).
Portrait photography while traveling. Always fix Orange Luminance (+10 to +15) regardless of which travel preset you use. Skin needs specific attention even when the priority is the landscape.
The Vesper Archive for travel
The Vesper Archive (V-Series) is the most versatile travel preset collection. Eight presets from clean everyday film to golden atmospheric to moody cinematic. All built on the same warm film philosophy so a travel gallery edited across the full series looks consistent.
V1 for general travel. V5 for golden hour. V4 for moody atmospheric. V7 for vibrant outdoor scenes.
EXPLORE THE VESPER ARCHIVE — $27
Free travel starting point
The free A6 preset is the most versatile starting point for travel photography. Clean, natural, and consistent across different lighting conditions.
FAQ
How do I make a travel gallery look consistent when the light changed constantly?
Sort photos by lighting condition and edit each group with a different preset variant from the same family. All presets on the same color philosophy look related even when different variants are used. Fixing white balance per group is the most important single step for consistency.
How many presets do I need for a full travel edit?
Three to five variants from the same collection cover most travel lighting scenarios. One for bright outdoor, one for overcast, one for warm/golden, one for low light.
What is the best Lightroom preset for travel photography?
The most versatile option is the A6 clean analog preset for bright daylight and the V1 Classic Film for warmer travel content. Both work across most travel conditions and look consistent together.