Best Lightroom Export Settings for Instagram 2026 — Sharp, No Quality Loss
Best Lightroom Export Settings for Instagram 2026 — Sharp, No Quality Loss
You edit a photo in Lightroom. The film look is exactly right. You export and upload to Instagram. It comes back softer, slightly different in color, the grain looks messy, and the contrast feels harsher than what you edited.
The problem is not your edit. It is the export settings. Instagram compresses every uploaded photo automatically — and if you export incorrectly, Instagram's compression destroys the subtle qualities of film editing faster than anything else.
These are the exact export settings that prevent it.

The complete export settings for Instagram
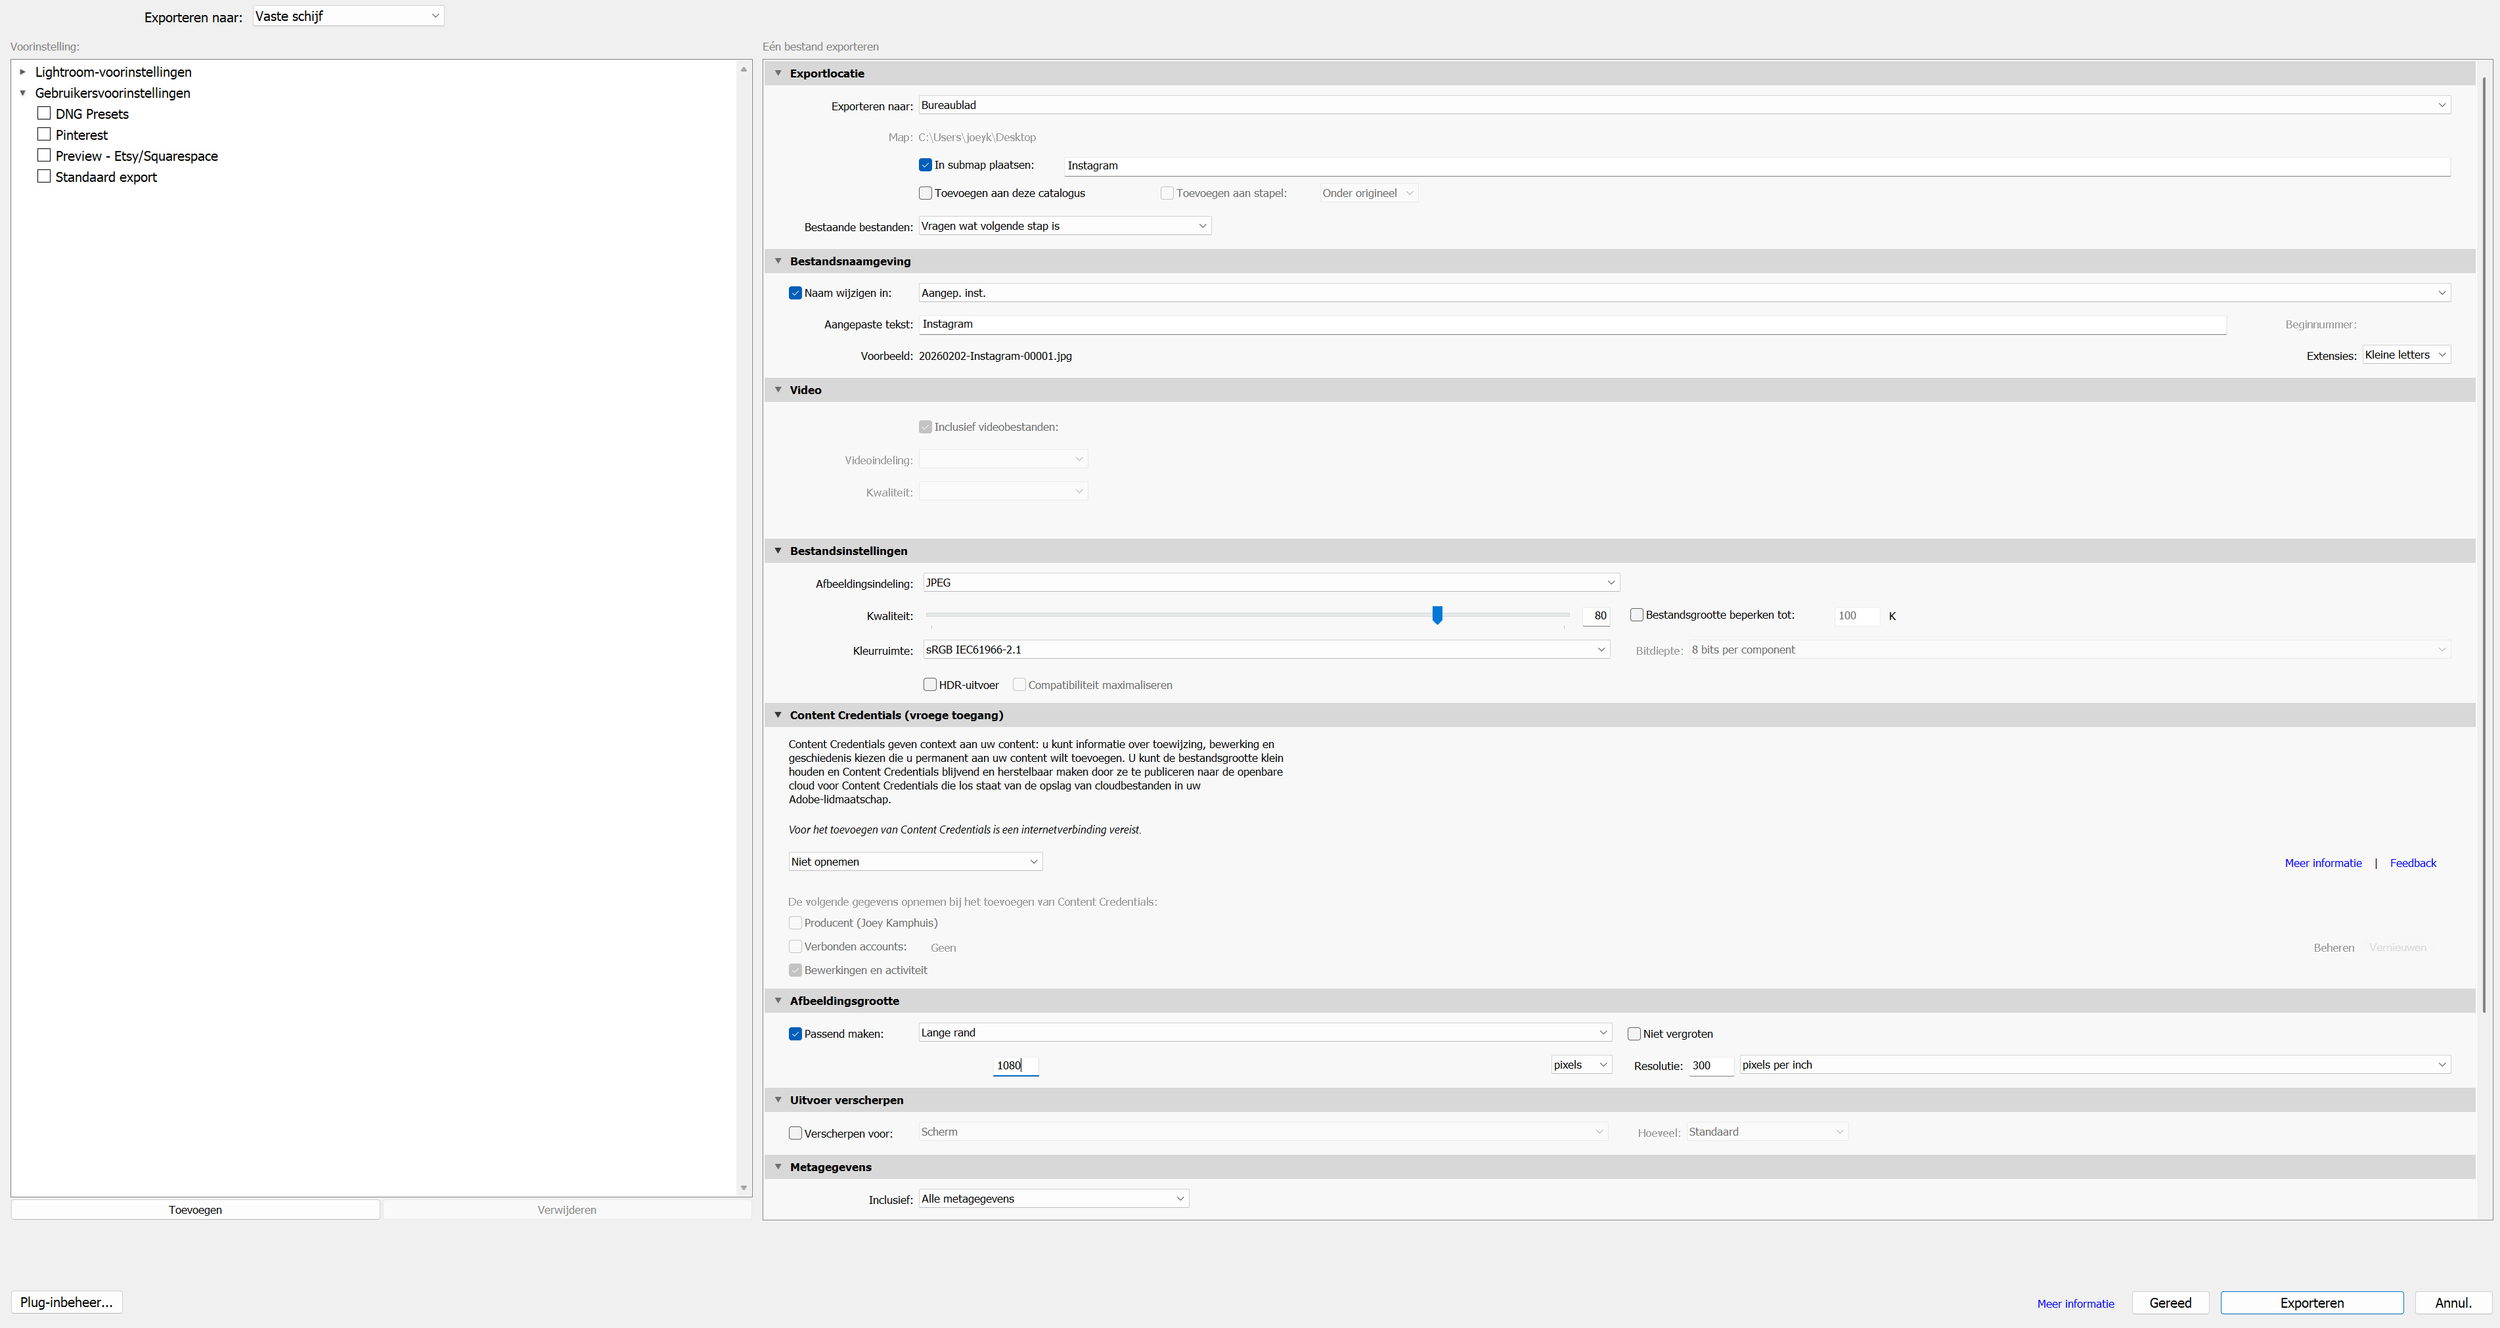
Lightroom Classic — File, Export
Format: JPEG Quality: 85% Color Space: sRGB Resize to Fit: Long Edge, 1350px (portrait) / 1080px (landscape) Resolution: 72 PPI Output Sharpening: None Metadata: Copyright only (optional)
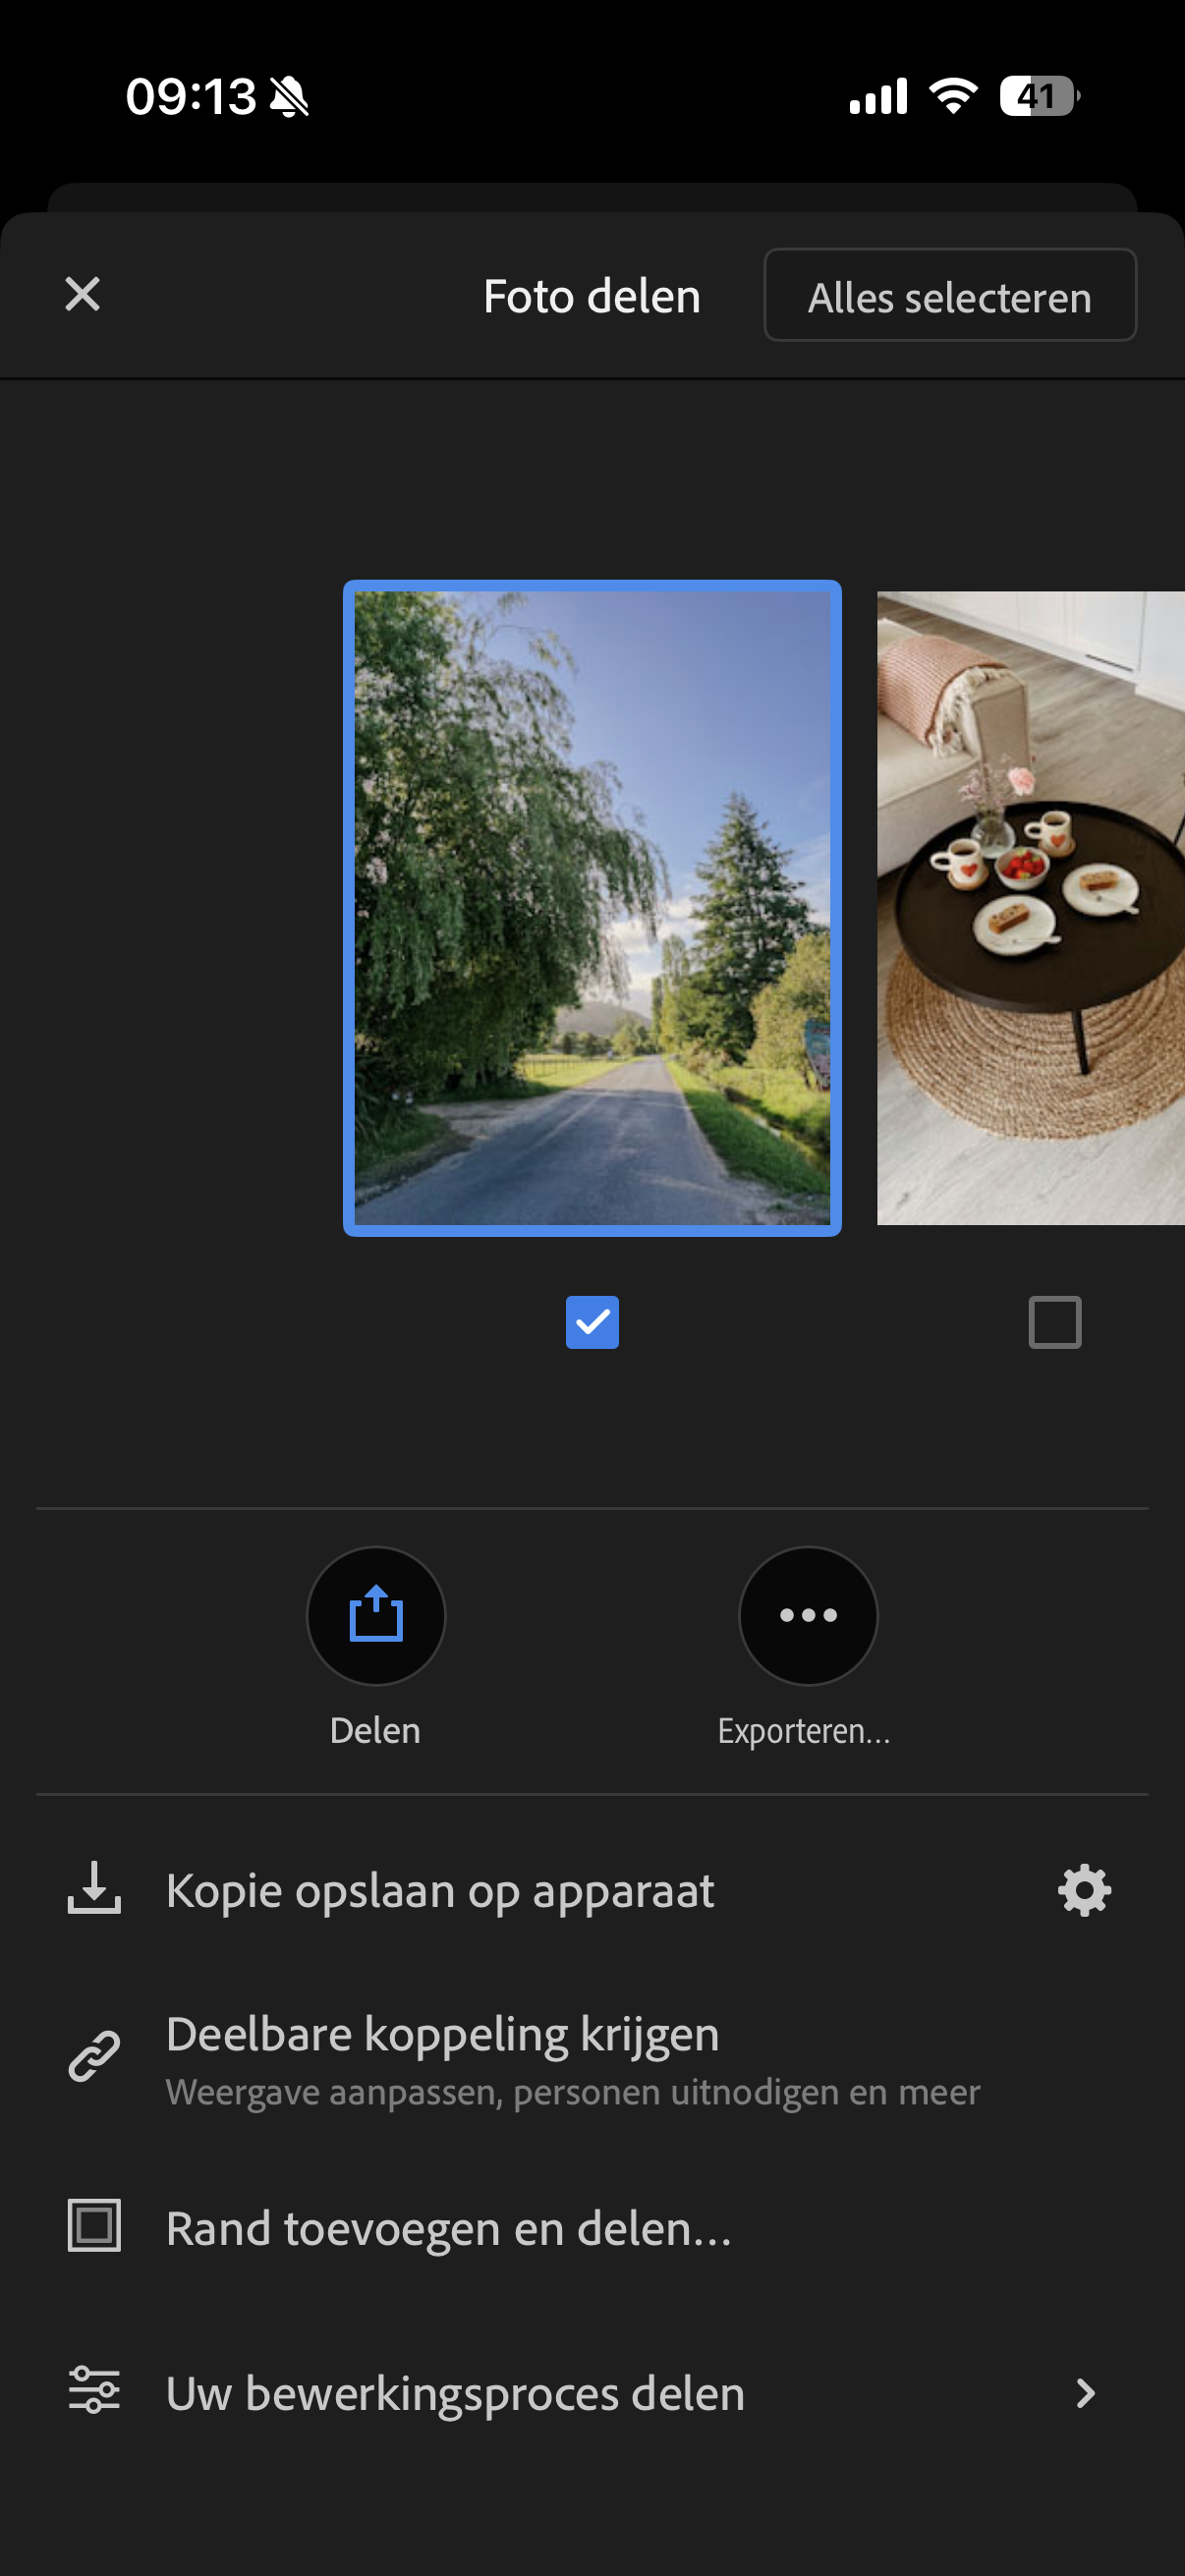
Lightroom Mobile — Share, Export As
Format: JPEG Dimensions: Custom — 1080 x 1350px (portrait) / 1080 x 1080px (square) Quality: 80-85% Color Space: sRGB
Why each setting matters
Format: JPEG, not PNG
Instagram handles JPEG more efficiently than PNG. PNG files are larger and trigger more aggressive compression. JPEG at 85% quality is the correct format for Instagram delivery.
Quality: 85% — not 100%, not 70%
This is counterintuitive but important. 100% quality creates a large file that Instagram compresses aggressively — often producing a worse result than a 85% export. 70% is too low and introduces visible compression artifacts. 80-85% is the sweet spot where Instagram applies minimal additional compression.
Color Space: sRGB — always
Instagram only correctly displays sRGB. If you export in Adobe RGB or ProPhoto RGB, Instagram converts it to sRGB automatically — and that conversion shifts colors, particularly reds, oranges, and skin tones. This is the most common cause of orange skin and shifted colors after upload.
Always export in sRGB, regardless of what color space you edit in.
Dimensions: export at Instagram's exact display size
Instagram displays images at a maximum of 1080px on the longest edge. If you upload larger, Instagram downsizes — and that downsizing shifts color and reduces perceived sharpness.
Export at exactly the dimensions Instagram will display:
Portrait (4:5): 1080 x 1350px — recommended for most Instagram photos
Square (1:1): 1080 x 1080px
Landscape (1.91:1): 1080 x 566px
Stories and Reels: 1080 x 1920px
The 4:5 portrait format takes up the most screen space in the feed and is the best format for visibility.
Output Sharpening: None
Instagram applies its own sharpening automatically. If your export already has output sharpening applied, the sharpening stacks — creating an oversharpened result that looks harsh and digital. Turn output sharpening off entirely.
Why film presets are more vulnerable to compression
Standard high-contrast edits survive Instagram compression relatively well because they have strong color differences between tonal ranges. Instagram's compression can remove subtle color transitions without visibly changing the overall look.
Film preset editing works the opposite way. The quality comes from subtle tonal transitions, soft highlight roll-off, and gentle color gradients — exactly the kind of information compression removes most aggressively.
This is why a film preset that looks perfect in Lightroom can look noticeably different on Instagram while a heavily filtered look seems unchanged. The correct export settings minimize what Instagram removes.
The direct upload workflow
For the most consistent results, use this workflow every time.
Edit in Lightroom, apply film preset
Export as JPEG, 85%, sRGB, 1080 x 1350px, no output sharpening
Transfer the exported file to your phone — do not re-save or compress
Upload to Instagram directly from the exported file, not from camera roll via Instagram's in-app editor
Do not apply any additional Instagram filters or editing
The Instagram in-app editor adds another layer of processing. Skip it entirely.
Export presets in Lightroom Classic
Save these settings as an export preset in Lightroom Classic so you never have to set them manually again.
File, Export. Set all settings as above. At the bottom left, click Add (below the Preset panel). Name it "Instagram Portrait" and save. Create a second preset for "Instagram Square" with 1080 x 1080px dimensions.
One click exports correctly every time.
Mobile export settings for each platform
Instagram Stories
Dimensions: 1080 x 1920px
Quality: 80-85%
Color Space: sRGB
No additional sharpening
Instagram Reels (photos in Reels)
Dimensions: 1080 x 1920px
Quality: 80-85%
Color Space: sRGB
TikTok (same principles)
Dimensions: 1080 x 1920px
Quality: 85%
Color Space: sRGB

Troubleshooting common export problems
Colors shift after upload (skin looks orange): Almost always caused by wrong color space. Check that export is set to sRGB. If already on sRGB, check that your monitor is calibrated and that what looks correct on screen matches sRGB output.
Photo looks softer than the Lightroom edit: Usually caused by uploading at too large a resolution. Instagram's downscaling from a large file reduces perceived sharpness. Export at exactly 1080 x 1350px and the softness disappears.
Grain looks messy or wrong: Grain is sensitive to compression. Export at 85% quality — lower quality destroys the organic film grain quality and makes it look like digital noise. If grain still looks wrong, reduce grain amount slightly in the preset.
Photo looks too dark on Instagram: Phone screens — particularly Samsung AMOLED — display photos brighter than calibrated monitors. What looks correct on a monitor may look slightly dark on a phone screen. Check the photo on your phone screen before exporting rather than relying on the monitor.
Story photos look blurry: Stories display at 1080 x 1920px. If you upload a lower resolution, Instagram upscales and the result looks blurry. Export at exactly 1080 x 1920px for Stories.
Full guide: why Instagram changes your colors
For the complete explanation of why Instagram compression affects film presets specifically and how to prevent every type of color shift: Why Instagram Ruins My Colors — And How to Fix It
Free preset calibrated for Instagram
The free A6 preset is calibrated with highlight protection and controlled saturation that survives Instagram compression well. The organic film tones hold their quality better than vivid or high-contrast editing.
FAQ
What is the best quality setting for Instagram in Lightroom?
85% in Lightroom Classic. 80-85% in Lightroom Mobile. This is counterintuitively better than 100% because Instagram compresses large files more aggressively than smaller ones.
Should I export at 72 or 300 DPI for Instagram?
DPI does not affect digital display — it only matters for print. 72 PPI is correct for Instagram. 300 PPI creates a slightly larger file for no visible quality improvement.
Why does my photo look different on my phone versus my computer after export?
Screen calibration differences. iPhone and Samsung screens display colors differently from calibrated desktop monitors. True Tone and Night Shift on iPhone also affect perceived warmth. Check photos on multiple screens before concluding there is an export problem.
Does the same export setting work for all Instagram formats?
The quality (85%), color space (sRGB), and no sharpening settings apply to all formats. Only the dimensions change per format — 1080 x 1350px for feed portrait, 1080 x 1080px for square, 1080 x 1920px for Stories and Reels.
Do these settings work for Lightroom Mobile on Android?
Yes. The settings are identical on Android. Full guide: Export Settings for Android Instagram