Best Lightroom Presets for Portrait Photography 2026
Best Lightroom Presets for Portrait Photography 2026
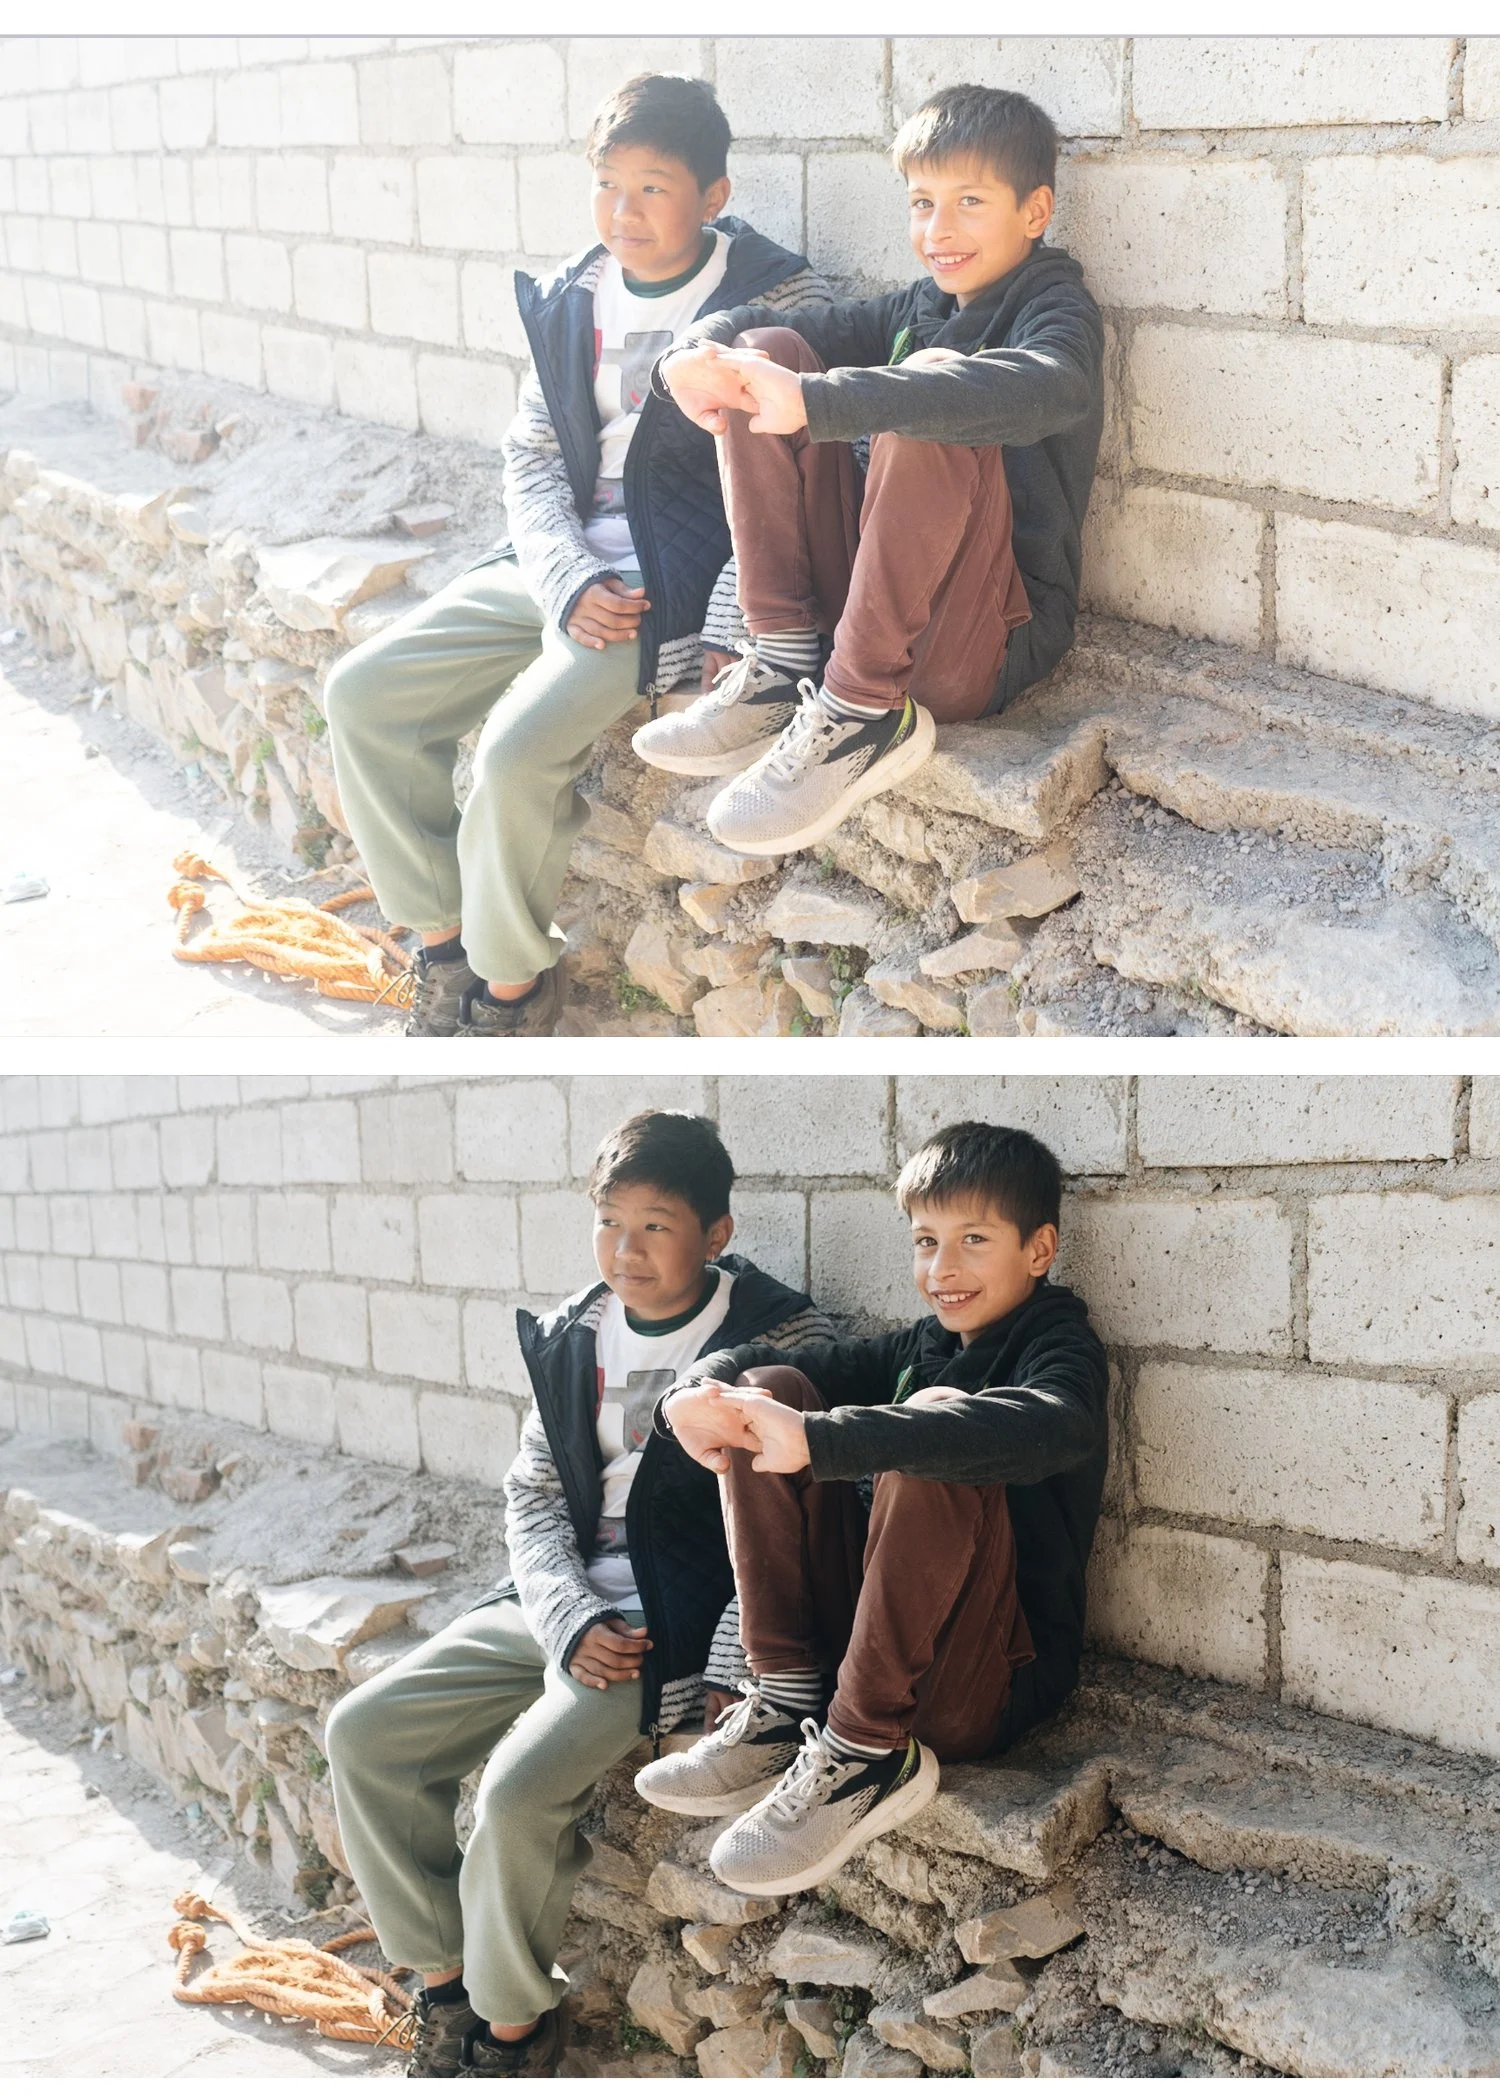
Portrait photography editing has one non-negotiable requirement: skin must look natural. The right preset makes skin warm, healthy, and luminous. The wrong preset pushes it orange, grey, or harshly textured.
Most preset reviews for portrait photography focus on aesthetics — which look is prettiest. This guide focuses on what actually matters for portraits: skin tone rendering, highlight protection on skin, and consistency across different skin tones and lighting conditions.
What makes a portrait preset work?
Natural orange channel — skin is primarily orange in Lightroom's colour model. A good portrait preset keeps Orange Saturation controlled (not over-boosted) and lifts Orange Luminance to brighten skin independently. This is the single most important technical characteristic of a portrait preset.
Negative clarity — clarity increases micro-contrast, which makes skin texture harsh and digital. Good portrait presets use slight negative clarity (-5 to -15) to remove the digital harshness of modern camera sensors.
Soft highlight roll-off — skin in direct light clips easily. Good portrait presets pull highlights back slightly and create a gentle roll-off rather than harsh clipping.
Skin-safe colour temperature — overly warm presets push skin toward orange. Overly cool presets push skin toward grey. Good portrait presets sit in a warm-but-neutral zone.
Best presets for portrait photography by skin tone
Portrait presets affect different skin tones differently. Here's what works across the most common scenarios.
Fair to medium skin tones
Best options: A6 Clean Portrait, G1 Clean Glow, E6 Soft Heritage
Fair to medium skin tones are the easiest to work with — most presets are calibrated for this range. The risk is over-warming (orange casts) or over-brightening (washed out skin).
A6 Clean Portrait keeps warmth controlled and uses Orange Luminance rather than Orange Saturation to brighten skin — the result is natural rather than warm. G1 adds a glowing highlight quality. E6 is softer and more romantic for fine art portrait work.
After applying: Check that orange tones haven't gone too vivid. If so, reduce Orange Saturation by -5 to -10.
Medium to olive skin tones
Best options: A6 Clean Portrait, G2 Warm Glow, E2 Rich Warm
Medium and olive skin tones handle warmth well — the risk is oversaturation making skin look processed rather than natural. The Orange and Red channels need to be balanced carefully.
G2 adds warmth in a way that enhances olive skin without pushing it toward orange. E2 is richer and warmer — works particularly well in warm natural light.
After applying: Check the Red channel — medium skin tones sometimes need slight Red Saturation reduction (-5) if cheeks look too flushed.
Dark skin tones
Best options: G3 Vibrant Glow, A1 Analog Original, E1 Warm Classic
Dark skin tones need different treatment from lighter skin. The biggest risk is presets designed for lighter skin tones making dark skin look muddy, flat, or over-warm.
Key adjustments for dark skin tones regardless of preset:
Orange Luminance: +15 to +25 (more than for lighter skin — dark skin needs more luminance lift)
Orange Saturation: 0 to -5 (keep controlled to avoid orange cast)
Shadow detail: Blacks +10 to +20 to prevent shadow detail from being lost
Clarity: -10 to -15 (remove digital harshness that reads differently on dark skin)
G3 Vibrant Glow is the most flattering for dark skin tones in the Glow Portrait Archive — the enhanced colour quality works with the natural richness of dark skin rather than against it.
For a dedicated guide: Best Lightroom Presets for Dark Skin Tones
Best presets for portrait lighting conditions
Natural window light
Best preset: A6 Clean Portrait or G1 Clean Glow
Window light is the most forgiving portrait lighting. Soft, directional, flattering. Both A6 and G1 work beautifully — the soft highlight roll-off of film presets enhances the gentle quality of window light.
Outdoor overcast light
Best preset: G2 Warm Glow or E4 Balanced Classic
Overcast light is flat and slightly cool. A preset that adds warmth and lifts the overall brightness compensates for the lack of natural warmth. G2 adds enough warmth to make overcast outdoor portraits feel alive rather than flat.
Golden hour
Best preset: A4 Golden Warmth or E7 Golden Warm
Golden hour is already warm — the preset needs to enhance rather than add warmth. Both presets are calibrated specifically for warm late-day light and protect highlights that golden hour tends to push toward clipping.
Indoor artificial light
Best preset: E4 Balanced Classic
Indoor artificial lighting (tungsten, LED, mixed) creates the most challenging white balance situations. E4 is the most neutral preset in the collection — corrects white balance first, then apply E4, then fine-tune warmth manually.
Studio flash
Best preset: A1 Analog Original or G1 Clean Glow
Studio flash creates even, neutral light with controlled shadows. The neutral base of A1 or the clean glow of G1 work well with the balanced quality of studio lighting.
Set a custom white balance for your specific flash setup before applying any preset.
The Glow Portrait Archive
The Glow Portrait Archive is our dedicated portrait preset collection — three presets specifically calibrated for natural skin rendering across different portrait scenarios.
G1 — Clean Glow: Clean, lightly warm film tones with glowing highlights. The most versatile portrait preset — works across skin tones and lighting conditions.
G2 — Warm Glow: Warmer with more pronounced glow on highlights. Best for warm natural light and golden hour portraits.
G3 — Vibrant Glow: More character and colour presence. Best for lifestyle content and portrait work with dark or olive skin tones.
$6.66 per preset. Portrait-specific colour science.
EXPLORE THE GLOW PORTRAIT ARCHIVE — $19.99
Free portrait preset
The free A6 preset is specifically calibrated for skin tone rendering — lifted Orange Luminance, controlled Orange Saturation, and negative Clarity that removes the digital harshness that makes skin look textured rather than smooth.
Test it on your own portrait photos before buying anything.
The five most common portrait preset mistakes
Over-warming skin — warm presets plus warm indoor light equals orange skin. Always check the Orange channel after applying and reduce Saturation if needed.
Too much clarity — clarity makes skin texture harsh and digital. Keep Clarity at 0 or negative for portrait work.
Ignoring white balance — the biggest source of inconsistent skin tones across a portrait session. Set white balance consistently before applying any preset.
Applying the same preset to every photo — a session shot across different lighting conditions needs different preset variations. Use a system, not a single preset.
Crushing shadows on dark skin — presets calibrated for lighter skin tones often go too dark on darker skin. Lift Blacks by +10-20 more than you would for lighter skin tones.
FAQ
What Lightroom preset is best for skin tones?
Presets that use Orange Luminance lifting rather than Orange Saturation boosting give the most natural skin results. The A6 Clean Portrait and G1 Clean Glow are specifically calibrated for this — brightening skin without adding colour casts.
How do I stop my portraits looking orange in Lightroom?
Three adjustments: reduce Orange Saturation by -5 to -15, check that white balance isn't too warm, and ensure the preset you're using doesn't over-boost warm tones. The A6 and G-series presets are calibrated to avoid orange casts specifically.
Do film presets work for professional portrait photography?
Yes — the film look is one of the most popular professional portrait aesthetics. The key is choosing presets with proper skin tone calibration rather than generic warm filters.
Can I use portrait presets for wedding photography?
Yes — portrait presets work well for the portrait component of wedding photography. For full wedding gallery coverage including ceremony and reception, the Essence Archive gives you more lighting-specific variations.
What's the difference between portrait presets and general film presets?
Portrait presets specifically prioritise skin tone rendering — Orange Luminance, Clarity reduction, and highlight protection tuned for skin. General film presets are calibrated for overall colour science across all subjects.