What Are Lightroom Presets? The Complete Guide (2026)
What Are Lightroom Presets? The Complete Guide (2026)
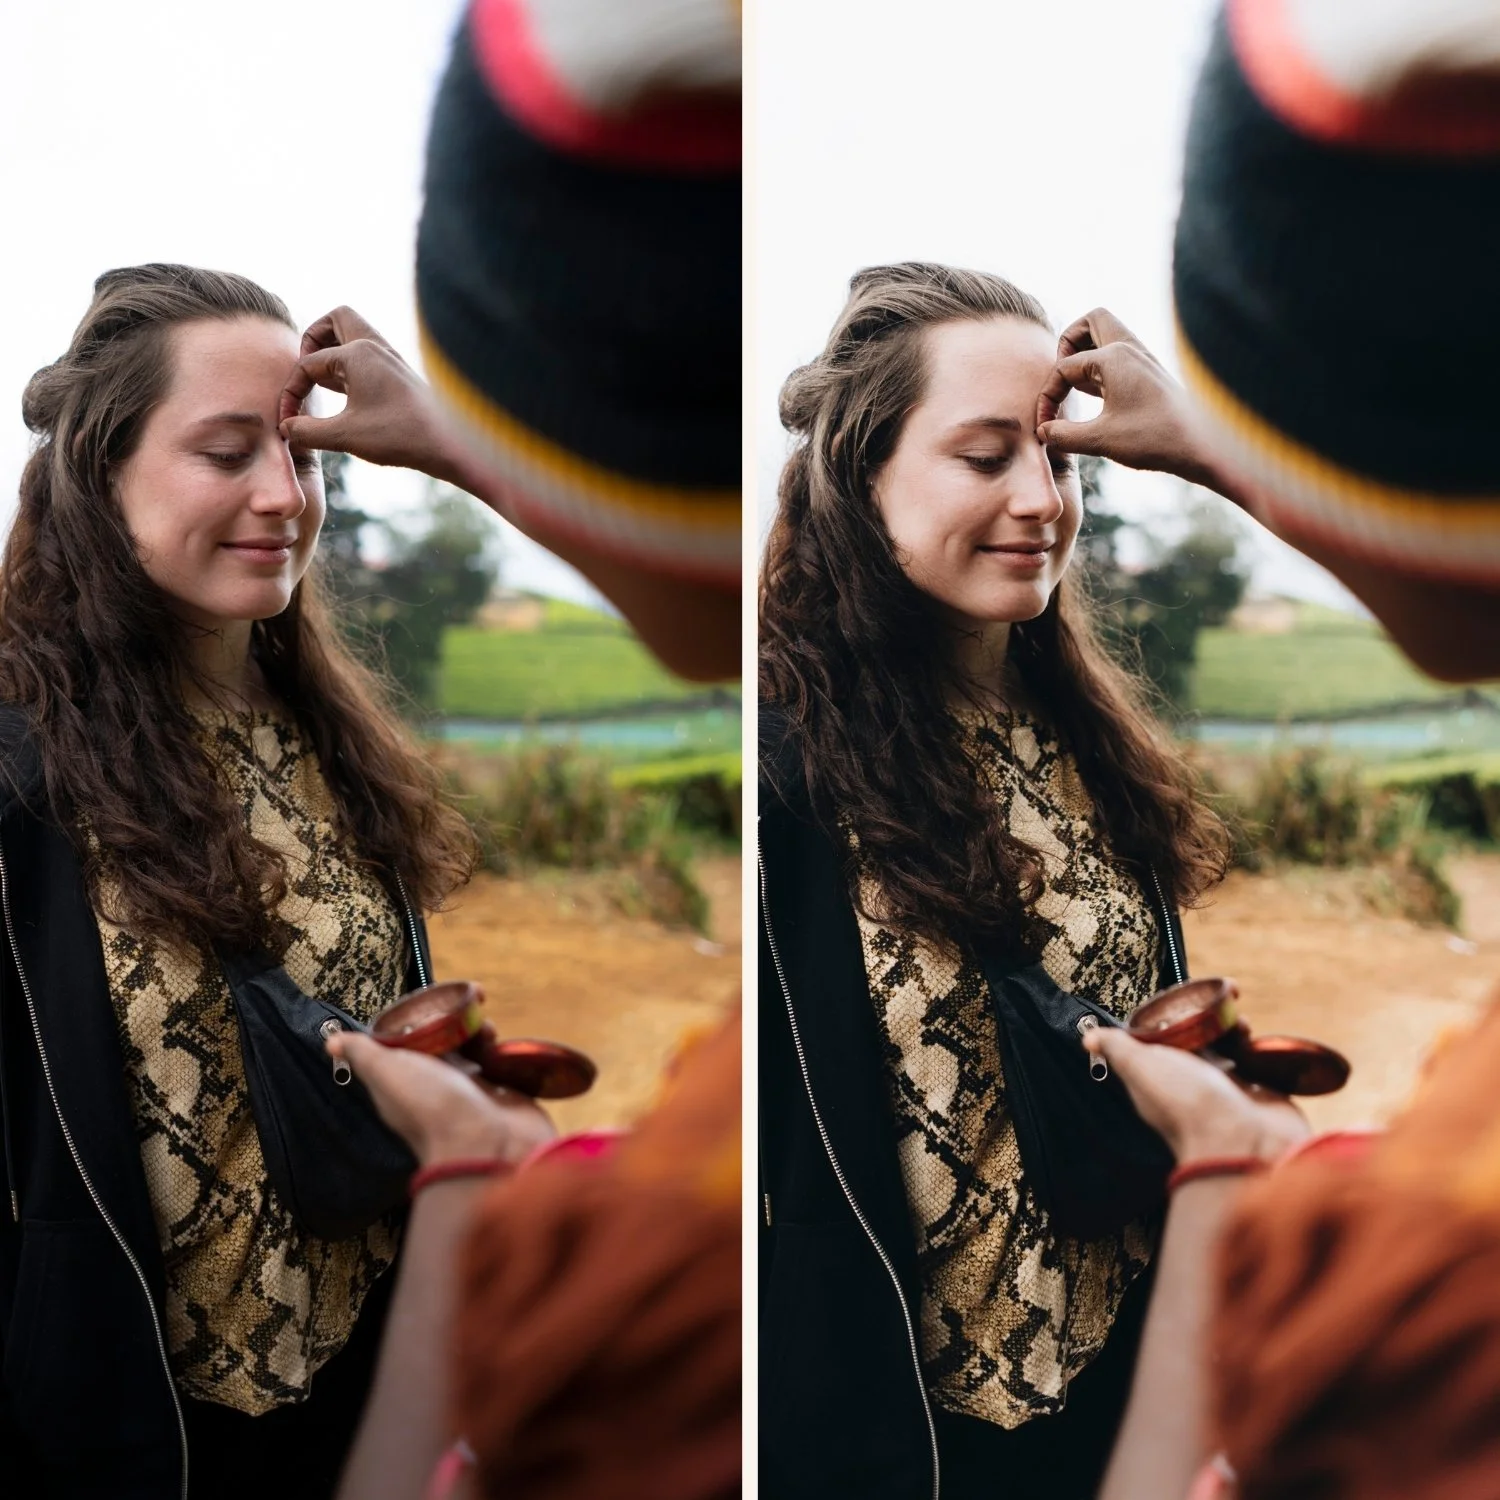
You've seen the photos. That clean, film-inspired edit on someone's Instagram feed. The warm, creamy portrait with soft highlights and natural skin tones. The consistent look across an entire gallery that feels intentional rather than random.
Behind almost every consistent photography aesthetic is a Lightroom preset.
This guide explains exactly what presets are, how they work technically, and how to choose the right one for your photography style — without the marketing fluff.
Download a free preset and follow along
The best way to understand presets is to try one on your own photos. Download our free Analog 06 preset before reading further — it takes 30 seconds and gives you something concrete to work with.
Works in Lightroom Classic, Lightroom CC, and Lightroom Mobile. No subscription required.
What is a Lightroom preset?
A Lightroom preset is a saved collection of editing adjustments that applies to a photo in one click. Instead of manually moving twenty different sliders every time you edit a photo, a preset moves them all at once — instantly applying a specific look.
Think of it as a recipe. The recipe specifies exact amounts of exposure, contrast, highlights, shadows, color grading, tone curve, grain, and other settings. You apply the recipe to any photo and get a consistent result every time.
What a preset actually changes:
Exposure and tone — overall brightness, highlights, shadows, blacks, whites
Contrast and tone curve — how the tonal range is distributed across the image
Color — white balance, HSL (individual color hue, saturation and luminance), color grading in shadows/midtones/highlights
Detail — sharpening, noise reduction, clarity, texture
Effects — grain, vignette
A preset can change all of these at once or only a few. A simple preset might only adjust the tone curve and add grain. A complex one might remap every color channel, add lifted blacks, adjust the tone curve precisely, and apply a specific grain structure.
Presets vs filters — what's the difference?
The terms are often used interchangeably but they're not the same thing.
Filters (Instagram, Snapseed, VSCO) are locked adjustments applied as a layer on top of your photo. You can usually adjust the strength but you can't see or change the individual settings. You're working within a closed system.
Lightroom presets apply directly to the raw editing parameters of your photo. After applying a preset, every slider remains fully editable. You can see exactly what the preset changed and adjust any part of it. You own the preset file permanently.
The practical difference: a filter is a ceiling. A preset is a starting point.
What does a preset file actually look like?
Presets come in two file formats:
XMP — a small text file (usually under 5KB) that contains the edit settings. This is the standard format for Lightroom Classic and Lightroom CC on desktop. If you open an XMP file in a text editor, you'll see the raw settings written out as code — exposure value, tone curve coordinates, HSL values, and so on.
DNG — a photo file with the preset settings embedded inside it. Used primarily for installing presets on Lightroom Mobile. The DNG file looks like a blank or grey image — it exists only to carry the settings.
Both formats result in an identical preset once installed. The format only affects how you install them.
What's the difference between a free and a paid preset?
Free presets give you one look. Paid preset bundles give you a system.
Free presets typically:
Cover one specific look in one lighting condition
Are not calibrated across different scenarios
May look great on the sample photo and inconsistent on yours
Paid preset bundles typically:
Include multiple variations on the same colour philosophy — daylight, golden hour, overcast, indoor
Are calibrated to work consistently across different lighting conditions, cameras, and skin tones
Come with DNG and XMP formats for both desktop and mobile
The real test of a preset is not how it looks on the sample photo — it's how it looks on your photos in your lighting conditions. That's why we offer a free preset: try it on your own photos before buying anything.
Do I need Lightroom to use presets?
Yes. Lightroom presets are built specifically for Adobe Lightroom. They work in:
Lightroom Classic — the desktop version used by most professional photographers
Lightroom CC (also just called "Lightroom") — the cloud-based desktop version
Lightroom Mobile — the free app for iPhone and Android
Lightroom Mobile is completely free to download and all preset functionality is included in the free version. You don't need a paid Adobe subscription to use presets on your phone.
How to choose the right preset for your style
The biggest mistake beginners make is buying a preset based on the sample photos rather than their own photography. A preset that looks beautiful on a golden hour portrait session may look completely wrong on your indoor lifestyle photos.
Ask yourself these questions before choosing:
What do you mainly photograph?
Portraits and people → look for presets with natural skin tone rendering, warm colour science
Travel and landscapes → look for presets with clean colour and good highlight protection
Lifestyle and Instagram content → look for presets with consistent results across mixed lighting
What aesthetic do you want?
Clean and minimal → lifted blacks, reduced contrast, neutral to warm colour
Warm and golden → enhanced warmth, golden highlights, Portra-inspired skin tones
Moody and cinematic → deeper shadows, controlled contrast, atmospheric colour
Light and airy → bright exposure, soft highlights, clean whites
Black and white → tonal separation, grain structure, matte or high contrast
Where will the photos be used? Instagram compression destroys subtle edits. Presets for Instagram need controlled contrast and subtle grain. Wedding galleries need presets that work consistently across 300 photos in varied lighting.
How to apply a preset in Lightroom
In Lightroom Classic:
Open a photo in the Develop module
Find the Presets panel on the left
Hover over a preset to preview it on your photo
Click to apply
Adjust white balance and exposure after applying
In Lightroom Mobile:
Open a photo
Tap Presets in the bottom toolbar
Browse your preset groups
Tap to preview, tap the checkmark to apply
The most important step after applying: adjust white balance and exposure for your specific photo. Presets are calibrated for a baseline — your photo's starting point will be different. White balance and exposure are always the first two things to tweak.
How to install presets
Installing presets takes less than five minutes. The method depends on your device:
Try a preset on your own photos — for free
Reading about presets only gets you so far. The only way to know if a preset works for your photography is to apply it to your actual photos in your actual lighting conditions.
Our free Analog 06 preset is a clean, minimal film look — lifted shadows, soft highlight roll-off, natural skin tones, subtle grain. It works in Lightroom Classic, CC, and Mobile on both JPEG and RAW files.
No subscription. Just the preset.
Ready to find your editing style?
Once you've tested the free preset, explore our full collection of preset bundles — covering clean film, moody, light & airy, golden hour, black & white, and more. Every bundle includes desktop XMP and mobile DNG files, and works in all versions of Lightroom.
Or if you want everything in one place — 130 presets covering every style for $89 ($0.68 per preset):
FAQ
Do Lightroom presets work on iPhone photos?
Yes. Presets work on JPEG and RAW files in Lightroom Mobile, including iPhone photos. They perform best on RAW files but work well on JPEGs too.
Can I use presets without a paid Adobe subscription?
Yes. Lightroom Mobile is free and includes full preset support. You don't need a Creative Cloud subscription to install or use presets on your phone.
Why does a preset look different on my photos than on the sample images?
Presets are calibrated for specific lighting conditions. A preset that looks perfect on a golden hour portrait will look different on an overcast photo or an indoor shot. Always adjust white balance and exposure after applying.
What's the difference between Lightroom Classic and Lightroom CC?
Lightroom Classic is the desktop-only version with the full feature set, used by most professional photographers. Lightroom CC (just called "Lightroom") is the cloud-based version that syncs across all devices. Both support the same presets.
Can I adjust a preset after applying it?
Yes — this is one of the key advantages of Lightroom over filter apps. After applying a preset, every slider remains fully editable. Use the preset as a starting point and fine-tune from there.
How many presets do I need?
Less than you think. Most photographers use 2–5 presets consistently. A good bundle gives you enough variations to handle different lighting conditions while staying visually cohesive. Quantity is less important than quality and consistency.
Are presets cheating?
No. Presets are a tool, like a brush preset in Photoshop or a template in any design software. Professional photographers have used darkroom techniques and processing shortcuts for as long as photography has existed. A preset is the modern equivalent.