Golden Hour Lightroom Preset — Complete Guide (2026)
Golden Hour Lightroom Preset — Complete Guide (2026)
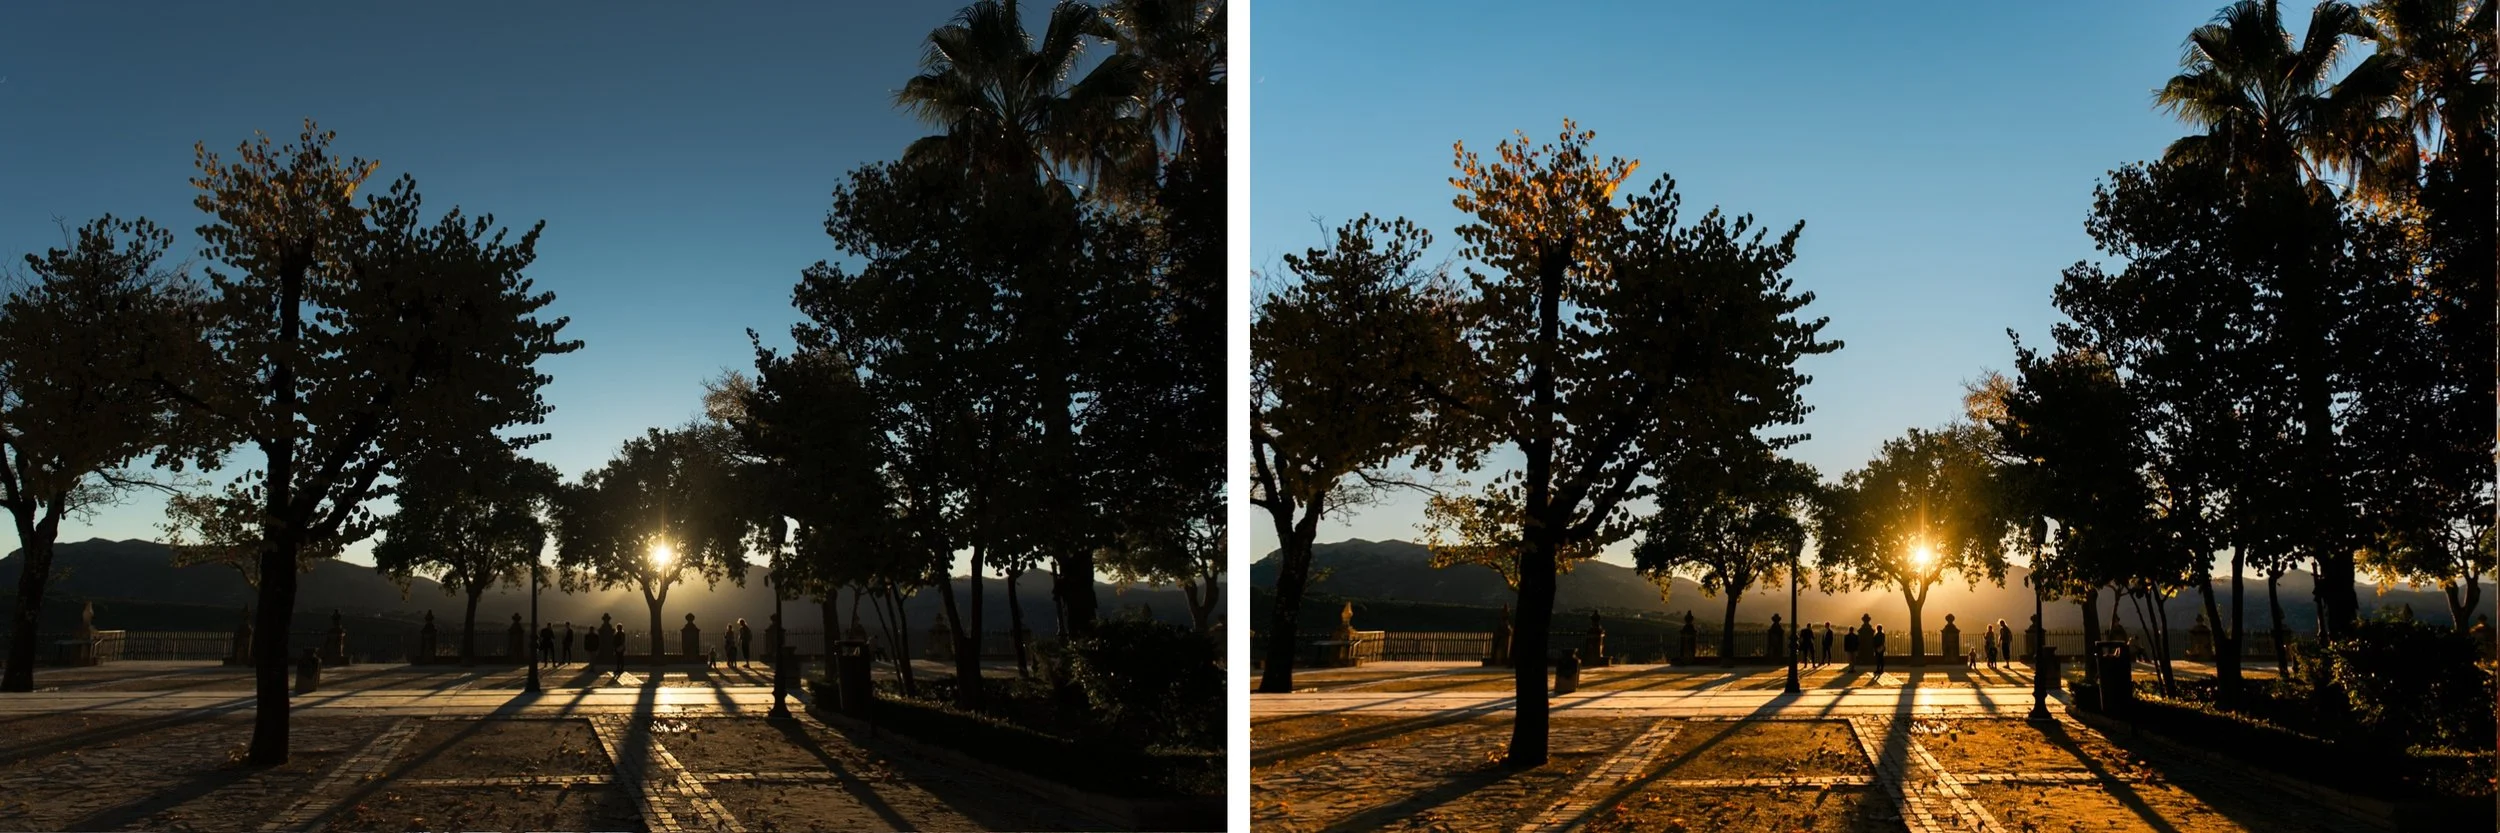
Golden hour light is the most flattering and sought-after in photography. For roughly an hour after sunrise and before sunset, the sun sits low on the horizon and light travels through more atmosphere before reaching your subject. The result is warm, directional, and soft — everything that makes photos look beautiful.
But not every shoot happens at the perfect moment. Location constraints, scheduling, and unpredictable weather mean that many photos are shot in less-than-ideal light. Golden hour Lightroom presets solve this in two ways: they enhance photos actually shot at golden hour, making the warmth and glow more pronounced and consistent, and they can add a degree of golden quality to photos shot in neutral or slightly warm light.
This guide covers the exact technique for golden hour editing, the most common mistakes, and which presets deliver the most consistent results across different golden hour scenarios.
What makes golden hour light special — and why presets help
Golden hour light has three characteristics that make it uniquely flattering:
Warmth — the long atmospheric path warms the light toward orange-yellow. This is why skin tones look so naturally beautiful at golden hour — the warm light acts like a natural color grade.
Directionality — low angle means light comes from the side rather than above. This creates dimension and shadow that flatters both landscapes and people.
Softness — the longer atmospheric path diffuses the light slightly, reducing harsh shadows and creating a gentler quality than midday sun.
The challenge is that even well-exposed golden hour photos often don't fully capture the warmth and glow that your eyes experienced. Camera sensors don't respond to warm light the same way human eyes do. A golden hour preset bridges this gap — it enhances what the camera captured to closer match what you saw and felt.
Exact Lightroom settings for golden hour
Basic panel:
Exposure: +0.2 to +0.5 (golden hour photos often benefit from a slightly brighter treatment)
Contrast: -10 to -20 (lower contrast keeps the look soft and glowing)
Highlights: -20 to -35 (critical — golden hour highlights blow out fast)
Shadows: +15 to +25 (lift shadows to open up the image)
Whites: -10 to -20
Blacks: +10 to +20
White Balance — the foundation:
Temperature: +200 to +500 (this is the foundation of the golden hour look)
Tint: +5 to +15 (slight magenta prevents the image looking too yellow)
Setting white balance correctly before applying any preset is essential. If your camera captured the scene too cool, the preset will fight against it.
Tone Curve:
Gentle S-curve
Lifted black point (+10-15 units on the bottom-left anchor)
Slightly softened highlights
Color Grading:
Highlights: warm orange-yellow (hue around 30-50, saturation 20-30)
Shadows: warm amber (hue around 20-40, saturation 15-25)
Midtones: neutral to slightly warm
This three-way color grading is what separates a good golden hour preset from simply raising white balance. The color grading applies warmth selectively — more in highlights and shadows, preserving natural color in midtones.
HSL — Hue:
Orange: shift toward yellow (+5 to +10) — natural skin rendering in warm light
Yellow: shift toward orange (-5 to 0)
Red: shift toward orange (+5) — warm rendering of warm subjects
HSL — Saturation:
Orange: +10 to +15 (enhance the golden quality of warm tones)
Yellow: +5 to +10
Green: -10 to -15 (mute greens slightly — they can look too vivid in warm light)
Blue: -15 to -20 (mute blues — they fight against the warmth)
HSL — Luminance:
Orange: +10 to +15 (critical for skin tones — brightens skin naturally)
Yellow: +5
Effects:
Grain Amount: 15-25
Size: 25-30
Roughness: 40-50
The most common golden hour editing mistakes
Pushing too much warmth — the most common mistake. White balance +500 plus warm color grading plus warm HSL adjustments makes photos look orange rather than golden. The goal is warm, not orange. Use one primary warmth adjustment — either white balance or color grading — not both at maximum.
Not protecting highlights — golden hour light is bright and directional. Highlights in bright areas (sky, reflective surfaces) clip fast. Pull Highlights to -30 to -50 before anything else. Recover the highlight detail before applying warmth.
Orange skin — the inevitable result of over-warming without skin protection. Fix: keep Orange Saturation at +10-15 maximum, ensure Orange Hue is shifted toward yellow (+5-10) rather than red, and check Orange Luminance is lifted (+10-15) to keep skin bright.
Applying to photos not shot in warm light — golden hour presets work best on photos shot in warm or neutral light. On cool, overcast, or artificial light photos the added warmth looks unnatural. Always check your white balance starting point before applying.
Forgetting to adjust per image — golden hour presets are calibrated for a baseline. Every golden hour photo has different amounts of warmth depending on exact time, location, and cloud cover. After applying the preset, adjust Temperature and the Color Grading warmth intensity to match the specific light in your photo.
Golden hour editing for different scenarios
Direct golden hour light (sunset/sunrise) The preset does most of the work. Pull Highlights more aggressively (-40 to -50) to recover the warm glow without blowing highlights. The Color Grading warmth may need to be reduced slightly — the ambient light is already providing the warmth.
Backlit golden hour Backlit subjects with warm sun behind them need extra shadow recovery (+25-30) and highlight protection (-40-50). The Color Grading warmth in highlights enhances the halo effect around the subject. Reduce overall exposure slightly to prevent blown sky.
Golden hour shade Subjects in shade during golden hour are lit by the warm reflected light from the sky — softer and less directional. The preset works beautifully here. Lift shadows more (+25-30) and use slightly less highlight protection (-20-25) since the shade prevents clipping.
Indoor window golden hour Warm afternoon light through a window is one of the most beautiful portrait lighting scenarios. The preset works well but watch white balance carefully — interior surfaces often cool the light slightly. Set white balance manually before applying.
Overcast golden hour Overcast days at golden hour give diffused, soft warm light rather than directional golden light. The preset can enhance this but the effect is subtler. Lift shadows more and use slightly less warmth than for direct golden hour.
Golden hour for portrait photography
Golden hour portrait editing has specific requirements beyond general golden hour technique.
Skin tone protection — warm light on warm-toned skin can push toward orange. The Orange Luminance adjustment (+10-15) keeps skin bright. Keeping Orange Hue shifted toward yellow (not red) prevents orange casts.
Highlight handling on skin — bright areas of skin in direct golden hour light can clip. Use the Highlights slider aggressively (-35 to -45) and check skin highlight detail in the histogram before exporting.
Eye detail — golden hour light can cause warm color casts in eyes. Use the Adjustment Brush or Masking tools to cool eyes slightly if they look unnatural.
Background vs subject balance — in backlit golden hour portraits, the background (warm sky) and the subject (in shadow) need different treatment. The Shadows slider lifts the subject. Highlight protection handles the sky. If the gap is too large, graduated filters help balance the two.
The Golden Hour Archive — four presets explained
The Golden Hour Archive contains four presets built specifically for warm, late-day light — each calibrated for a different golden hour scenario.
Golden Hour I — Warm Base The foundation golden hour look. Warm highlights, natural skin tones, open shadows. Works across all golden hour scenarios from subtle late afternoon warmth to full sunset glow. The most versatile starting point.
Golden Hour II — Sun-Kissed More pronounced warmth and slightly higher saturation than Golden Hour I. Enhanced golden tones that work particularly well for direct golden hour light and sun-drenched outdoor scenes. Best when the light is already warm and you want to enhance rather than create the effect.
Golden Hour III — Soft Glow Softer and dreamier than I and II. Glowing highlights with a gentle, slightly ethereal quality. Best for portrait sessions at golden hour where the romantic, flattering quality of the light is the focus.
Golden Hour IV — Rich Sunset The warmest and most saturated preset in the collection. Best for dramatic sunset scenes with strong warm light — when the sky is genuinely golden-orange and you want to fully enhance the warmth of the moment.
→ Get the Golden Hour Archive — $27
For more golden hour and warm travel presets, the California Archive covers a broader range of warm outdoor and travel scenarios:
→ California Archive — 9 warm travel presets, $27
Or get both plus every other collection:
FAQ
What is a golden hour Lightroom preset?
A golden hour preset enhances warm, late-day light tones — warm highlights, sun-kissed color, natural skin tones in warm light, and soft contrast. It amplifies the warmth and glow of golden hour photography and can add a degree of golden quality to photos shot in neutral light.
Can golden hour presets work on photos not shot at golden hour?
Yes, with limits. The preset adds warmth that works best on neutral to warm-toned starting points. On cool or overcast photos the added warmth can look unnatural. The further from warm starting conditions, the more manual adjustment is needed after applying.
How do I stop highlights blowing out in golden hour photos?
Pull Highlights to -35 to -50 before applying any preset. Check the histogram — blown highlights appear as a spike on the right edge. Use the Whites slider (-15 to -25) as additional protection. In Lightroom Classic, you can hold Alt/Option while dragging Highlights to see exactly which areas are clipping.
How do I protect skin tones in golden hour editing?
Increase Orange Luminance by +10-15. Keep Orange Saturation at +10-15 maximum. Ensure Orange Hue is shifted toward yellow (+5-10) rather than red. These three adjustments keep skin bright and natural within the warm palette.
What's the difference between golden hour and summer presets?
Golden hour presets specifically target the warm, directional light of sunrise and sunset. Summer presets are broader — covering beach, travel, lifestyle, and outdoor photography in general summer conditions including midday and overcast. Use golden hour presets for the specific quality of low-sun light, summer presets for general warm-season outdoor photography.