Lightroom Mobile vs Snapseed for Film Editing
Lightroom Mobile vs Snapseed for Film Editing
Both Lightroom Mobile and Snapseed can produce a film look. The question is not whether it is possible in each application, but how much work it takes, how precisely you can control the result, and whether the result is repeatable across a set of photographs rather than achieved once by trial and error. This comparison focuses narrowly on film aesthetic editing rather than general capability. For the broader feature comparison covering repair tools, local adjustments, pricing, and overall workflow philosophy, Lightroom vs Snapseed addresses the wider question of which application suits which kind of photographer.

The Five Adjustments Film Editing Depends On
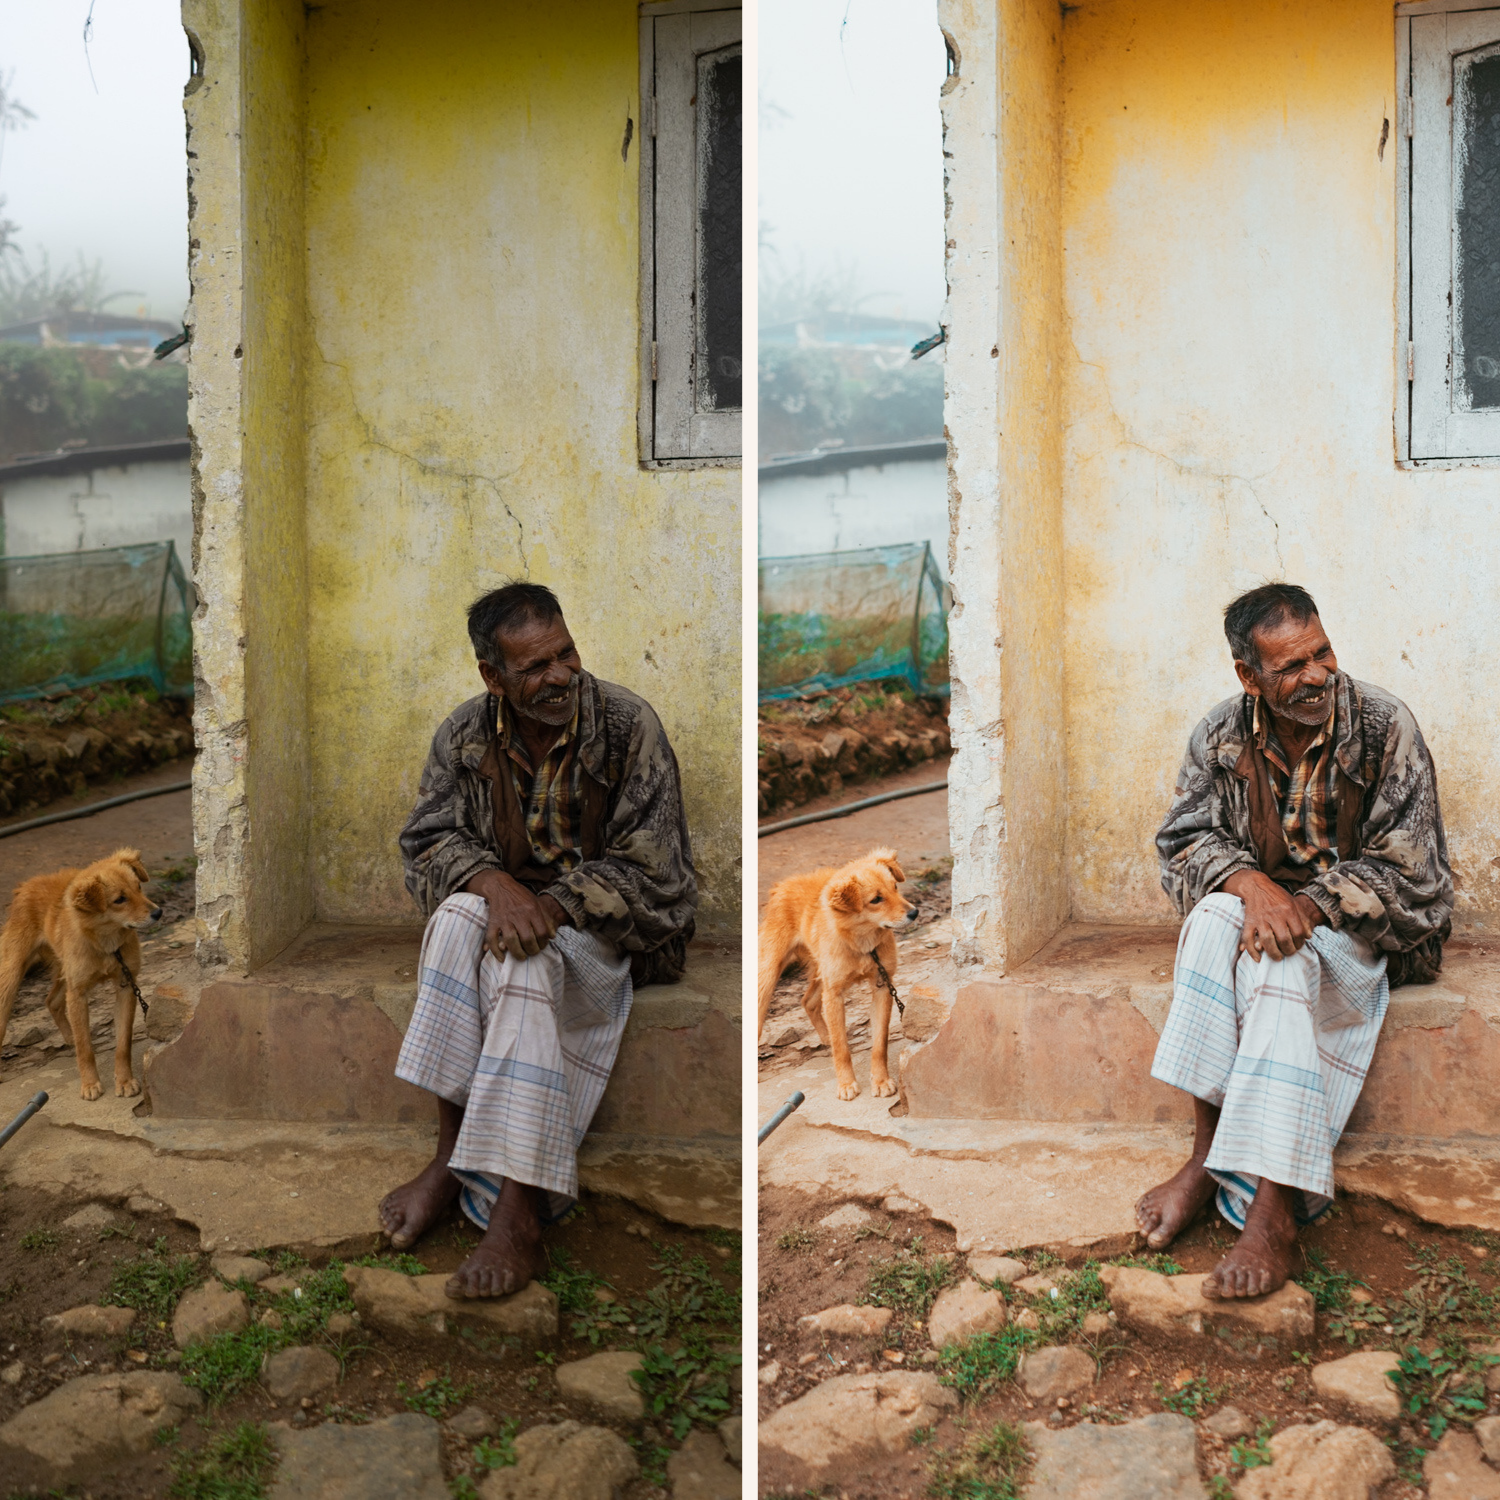
A convincing film look requires five specific things. A lifted shadow floor so shadows never reach pure black. Soft highlight roll off so bright areas compress gradually rather than clipping. Channel level colour control, particularly in the Green and Orange channels. Gentle midtone contrast built through a curve rather than a global slider. And calibrated grain with control over character rather than just intensity.
Comparing the two applications for film editing means comparing how well each handles these five requirements specifically, rather than comparing overall feature counts.
Shadow Floor and Highlight Roll Off
Lightroom Mobile has a full Tone Curve with individual point control, available with a Creative Cloud subscription. This allows lifting the shadow point to an exact output value and pulling the highlight point down to create genuine roll off in the brightest areas. The free version has a simplified curve with less precision, but the Blacks and Whites sliders together can approximate the effect adequately.
Snapseed has a Curves tool with preset curve shapes and manual point adjustment. It is genuinely capable but less precise, and the touchscreen interface makes small exact adjustments harder to achieve consistently than in Lightroom.
For this requirement Lightroom is ahead, meaningfully so with a subscription and marginally so without one. The specific curve shapes that produce film tonal behaviour, and why the shadow and highlight points matter more than the midtone shape, are covered in Understanding Color Curves for Film Editing.
Channel Level Colour Control
This is the decisive difference between the two applications for film work.
Lightroom Mobile has a full HSL panel with eight independent colour channels, each with separate Hue, Saturation, and Luminance control. Reducing Green Saturation by 20 while shifting Green Hue toward yellow and increasing Green Luminance slightly is three precise adjustments to a single colour channel. This combination is the adjustment that most reliably separates film looking outdoor photography from digital looking outdoor photography, and no other adjustment substitutes for it.
Snapseed has no equivalent capability. Its colour controls are global saturation and warmth, plus a White Balance tool that shifts overall temperature and tint across the whole image. There is no mechanism for addressing the Green channel independently of everything else in the frame.
For film editing this is not a small gap. The organic outdoor colour that defines the film aesthetic depends entirely on channel level control. Without it, the closest achievable result is a globally desaturated photograph, which reads as muted rather than as film.

Contrast Structure
Both applications can reduce global contrast and rebuild tonal separation with a curve. Lightroom's curve implementation is more precise and easier to adjust in small increments. Snapseed's is workable and produces acceptable results.
Neither application has a meaningful advantage in the Contrast slider itself, which film editing generally avoids in favour of curve based separation anyway.
Grain
Lightroom Mobile has three independent grain controls: Amount, Size, and Roughness. This allows matching the grain character to the specific film aesthetic being referenced, since fine grain from a slow film stock and coarse irregular grain from pushed fast film are genuinely different textures with different visual associations.
Snapseed has a Grainy Film filter with a single intensity slider and a set of preset styles. It applies grain competently but without independent control over size and roughness, which means you get the app's interpretation of grain rather than a calibrated match to a particular film character.
For photographers who care about grain character rather than simply grain presence, Lightroom is clearly ahead. The Role of Grain in Film Emulation covers why the three parameter control matters and which values suit which aesthetic directions.
Repeatability Across a Set
Lightroom Mobile has a full preset system. Install once, apply to any photograph with one tap, copy settings across a batch of photographs. This makes achieving a consistent film look across fifty photographs a five minute operation rather than a five hour one.
Snapseed has Looks, which save a set of adjustments for reuse within the app on the same device. They cannot be installed from files, shared between devices or users, or applied in batch to multiple photographs simultaneously.
For a single photograph this difference does not matter at all. For a shoot, it is the difference between a coherent gallery and fifty individually edited images that do not quite match.
Where Snapseed Wins
Snapseed is better for selective local adjustments. The Selective tool with control points is faster and more intuitive on a touchscreen than Lightroom Mobile's masking interface. For lifting a face relative to a background or darkening a distracting bright area in a corner, Snapseed is quicker and more precise with a finger.
Snapseed's Healing tool is significantly better than Lightroom Mobile's equivalent for removing unwanted elements from a frame cleanly.
Snapseed is completely free with no restricted features, no subscription, and no upsell.
The Practical Answer
For film aesthetic editing specifically, Lightroom Mobile is the better tool, primarily because of channel level HSL control and the preset system. The film look depends on adjustments Snapseed simply cannot make.
A reasonable combined workflow is to complete the film edit in Lightroom Mobile including preset application and colour work, then export at full resolution and use Snapseed for any local adjustment or repair that Lightroom Mobile handles less elegantly.
For photographers starting from scratch on mobile, Best Film Presets for Lightroom Mobile covers installation and the calibration adjustments that make mobile film editing predictable across different phone cameras.
FAQ
Can I get a film look in Snapseed at all?
Yes, approximately. The Grainy Film filter combined with curve and white balance adjustments produces a film adjacent result. The limitation is channel level colour control, which is the difference between film adjacent and film convincing.
Is the free version of Lightroom Mobile enough for film editing?
Mostly. Preset installation and application work fully without a subscription. The HSL panel is available. The full Tone Curve requires a subscription, but presets that include curve adjustments still apply them correctly on the free version.
Should I use both applications together?
Many photographers do. Lightroom for the film edit and colour work, Snapseed for repair and selective adjustments. Export at full resolution between applications to avoid quality loss in the handoff.
Try film preset editing in Lightroom Mobile:
Download the free Analog Film presetand install it in Lightroom Mobile to see how a calibrated preset compares to manual adjustment in either application.
For a complete mobile compatible collection, the Analog Film Archiveprovides ten calibrated film looks in DNG format. The Studio Archiveat $89 includes every collection.
